
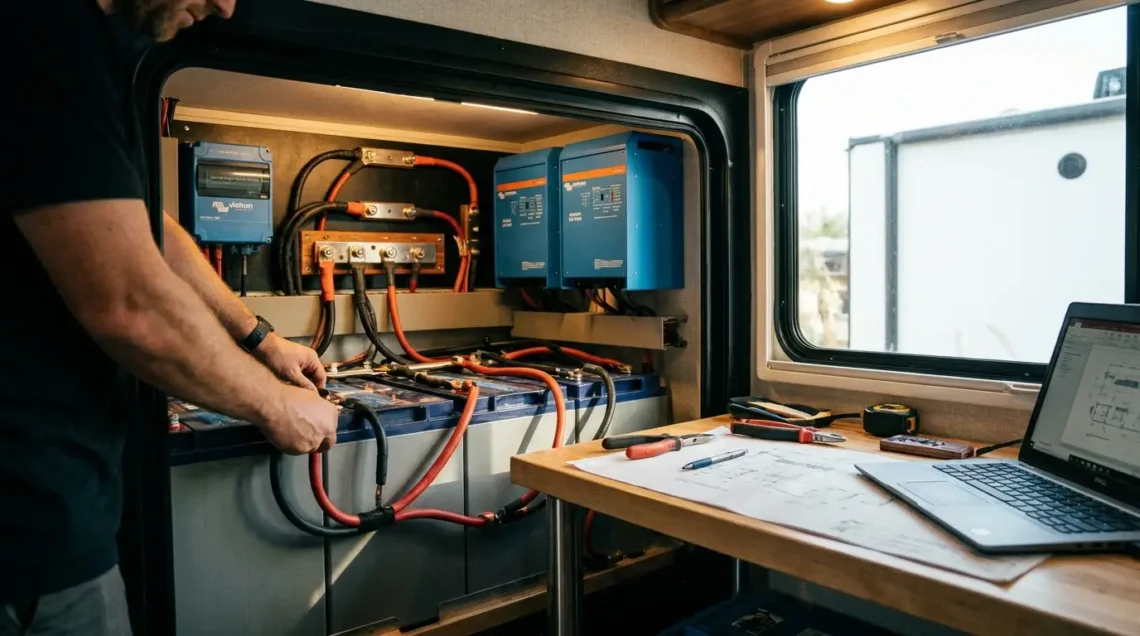
Stting up the electrical system for your RV ranks among the most critical skills you’ll develop as an owner. Whether you’re planning weekend getaways or full-time travel, understanding battery configurations, power management, and system maintenance directly impacts your comfort and independence on the road. Moreover, a properly designed battery setup can mean the difference between enjoying modern conveniences off-grid and cutting your trips short due to power failures.
The core of any RV battery setup involves selecting the right battery type, calculating your power needs, installing components safely, and maintaining the system for longevity. Most beginners start with a single deep-cycle battery and shore power, while advanced users integrate lithium battery banks, solar charging, inverters, and sophisticated monitoring systems. The key is matching your electrical system to your camping style—whether you primarily use hookups at campgrounds or prefer boondocking in remote locations where self-sufficiency matters most.
Key Takeaways
- Choose battery chemistry based on budget and camping style—lead-acid for occasional users, lithium for frequent boondockers
- Calculate your daily amp-hour consumption by listing every device you’ll use and its runtime to properly size your battery bank
- Never mix battery types or ages in the same bank, as this creates imbalances that reduce performance and lifespan
- Install proper fusing within 7 inches of the battery positive terminal to prevent catastrophic electrical fires
- Monitor voltage daily rather than relying on guesswork—maintaining proper charge cycles extends battery life by years
Understanding RV Electrical Systems
Recreational vehicles operate on dual voltage systems that work independently yet cooperatively. The 120-volt AC system mirrors your home electrical setup, powering air conditioners, microwaves, and standard outlets when plugged into shore power or running a generator. Meanwhile, the 12-volt DC system runs lights, water pumps, fans, furnace blowers, and electronics directly from your battery bank.
The converter serves as the bridge between these systems, transforming 120-volt AC power into 12-volt DC current to charge batteries and operate DC appliances when connected to shore power. Consequently, understanding this relationship helps you grasp why battery health matters even when plugged in—many converters aren’t designed for continuous battery maintenance.
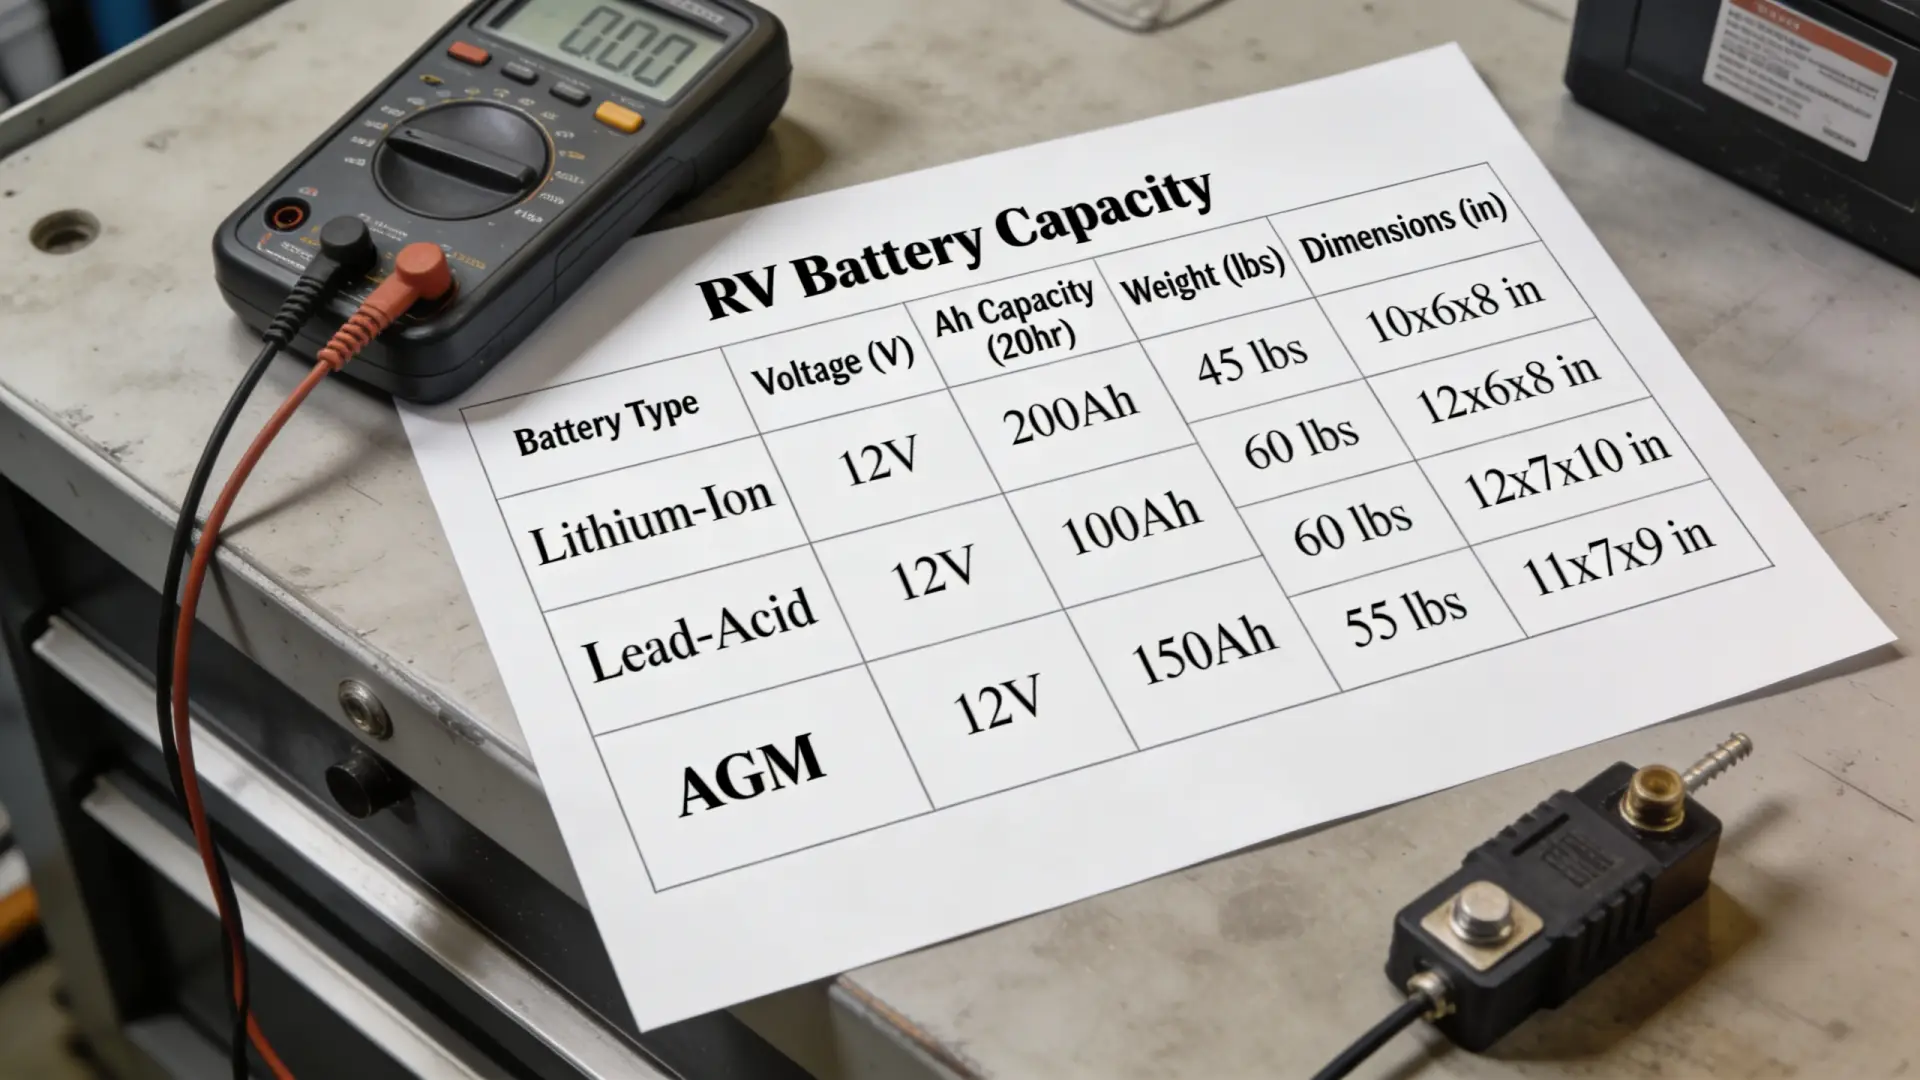
Battery capacity is measured in amp-hours (Ah), representing how many amps a battery can deliver over one hour before requiring recharge. A 100Ah battery theoretically provides 5 amps for 20 hours or 20 amps for 5 hours. However, in practice, discharge rates, temperature, and battery chemistry significantly affect actual performance.
The House Battery vs. Chassis Battery Distinction
Your motorhome contains two separate battery systems that should never be confused. The chassis battery starts the engine and powers automotive functions like headlights and wipers. The house battery bank powers living space amenities when the engine is off or when disconnected from shore power.
These systems remain isolated through battery disconnect switches and solenoids to prevent depleting your starting battery while camping. Additionally, most motorhomes include a battery boost or merge function that temporarily connects both systems for emergency engine starting if the chassis battery fails.
Battery Types Explained: Choosing Your Power Source
Selecting the right battery technology fundamentally shapes your RV electrical experience. Each chemistry offers distinct advantages and limitations regarding cost, maintenance, lifespan, and performance characteristics. Therefore, matching battery type to your usage patterns prevents frustration and wasted investment.
Flooded Lead-Acid Batteries
Traditional flooded lead-acid batteries represent the most economical entry point for RV power systems. These batteries contain liquid electrolyte that requires periodic water additions to replace fluid lost during charging. They’re readily available, serviceable, and provide adequate performance for weekend warriors who primarily use campground hookups.
However, flooded batteries demand regular maintenance, must be installed upright in ventilated compartments, and release hydrogen gas during charging. Furthermore, they tolerate only 50% depth of discharge before suffering permanent capacity loss, meaning a 200Ah bank realistically provides just 100Ah of usable power.
AGM (Absorbent Glass Mat) Batteries
AGM technology suspends electrolyte within fiberglass mat separators, creating a sealed, maintenance-free design. These batteries charge faster than flooded types, handle vibration better, and can be mounted in any orientation. They’re also safer for indoor installation since they don’t vent dangerous gases under normal conditions.
The trade-off comes in higher upfront costs—typically 40-60% more than equivalent flooded batteries. Nevertheless, AGM batteries justify the premium for travelers who want reliable power without maintenance hassles. They still observe the 50% discharge limit that characterizes all lead-acid chemistry.
Lithium Iron Phosphate (LiFePO4) Batteries
Lithium batteries have revolutionized RV power systems despite their substantial initial investment. A quality 100Ah lithium battery safely discharges to 80-90% depth, providing nearly double the usable capacity of lead-acid equivalents. They charge in a fraction of the time, weigh 60% less, and last 3,000-5,000 cycles compared to 300-500 for lead-acid.
Temperature sensitivity represents the primary consideration—lithium batteries shouldn’t charge below freezing without internal heating systems. Additionally, they require specialized charging profiles and Battery Management Systems (BMS) to prevent damage. For serious boondockers and full-timers, however, the performance gains and long-term economics overwhelmingly favor lithium technology.
| Battery Type | Usable Capacity | Cycle Life | Best For |
|---|---|---|---|
| Flooded Lead-Acid | 50% (100Ah usable from 200Ah) | 300-500 cycles | Weekend campers, tight budgets |
| AGM | 50% (100Ah usable from 200Ah) | 400-600 cycles | Regular travelers, low maintenance |
| Lithium (LiFePO4) | 80-90% (180Ah usable from 200Ah) | 3,000-5,000 cycles | Full-timers, boondockers, solar systems |
Calculating Your Power Needs
Accurate power consumption calculations prevent under-sizing your battery bank and experiencing premature power depletion. Start by creating a comprehensive appliance inventory listing every device you’ll operate while off-grid. Include lights, water pump, furnace fan, refrigerator (if running on 12V mode), phone chargers, laptops, and entertainment devices.
For each item, determine its amp draw and estimated daily runtime. LED lights typically draw 0.3-0.5 amps, water pumps use 4-8 amps during operation, furnace fans consume 5-9 amps, and refrigerators cycle between 2-8 amps depending on model and ambient temperature. Multiply amps by hours of use to calculate amp-hours consumed per device daily.
Sample Daily Power Consumption
Consider a typical scenario for a couple spending three days off-grid. Their consumption might look like this:
- LED lighting (6 fixtures × 0.4A × 5 hours): 12Ah
- Water pump (7A × 0.5 hours total runtime): 3.5Ah
- Furnace fan (7A × 3 hours): 21Ah
- Refrigerator cycling (4A × 8 hours): 32Ah
- Phone/device charging (2A × 4 hours): 8Ah
- TV and satellite receiver (5A × 3 hours): 15Ah
This totals approximately 91.5Ah daily consumption. For a three-day trip without recharging, you’d need 274.5Ah of storage. With lead-acid batteries limited to 50% discharge, you’d require a 550Ah battery bank. Alternatively, a 300Ah lithium bank provides adequate capacity with room to spare.
Always add a 20% safety margin to calculations, accounting for inefficiencies, temperature effects, and unexpected usage. Additionally, consider your charging capabilities—if you’re integrating solar panels into your setup, you can reduce battery capacity requirements since daily recharging offsets consumption.
Basic Battery Setup for Beginners
New RV owners typically start with the factory-installed single battery configuration, which often proves adequate for campground use with electrical hookups. However, upgrading to a quality deep-cycle battery immediately improves reliability and performance compared to the budget units manufacturers often install.
Single Battery Installation Steps
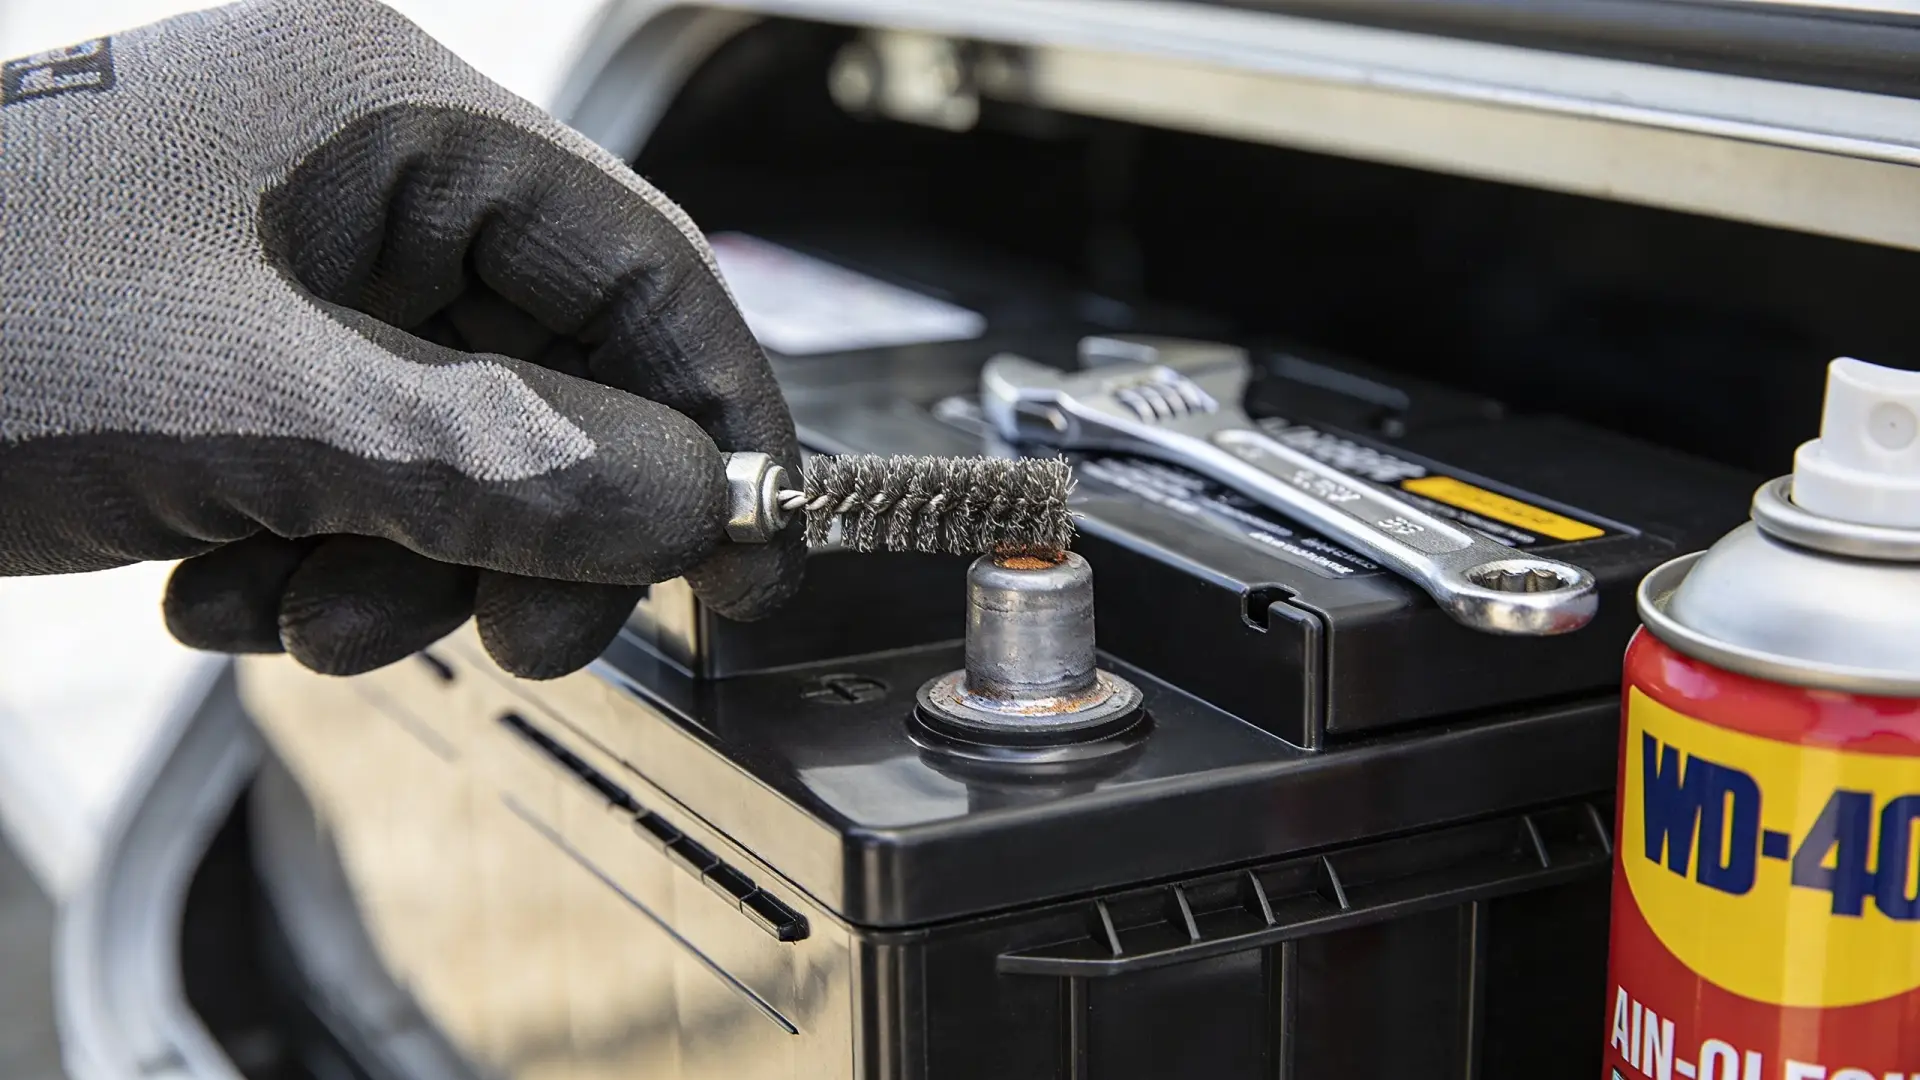
When replacing or upgrading your primary house battery, follow these essential steps. First, disconnect shore power and turn off the battery disconnect switch. Remove the negative cable first, then the positive, marking each connection for correct reinstallation. Clean battery terminals and cable ends with a wire brush to ensure solid electrical contact.
Position the new battery in the compartment, securing it with the hold-down bracket to prevent movement during travel. Connect the positive cable first, followed by the negative ground. Apply dielectric grease to terminals after tightening connections to prevent corrosion. Finally, verify proper polarity with a voltmeter before reconnecting shore power or the disconnect switch.
Essential Components for Basic Systems
Even simple setups require proper safety devices and connections. Install an inline fuse or circuit breaker within 7 inches of the positive battery terminal, sized appropriately for your system’s maximum current draw. A 100A breaker typically suffices for systems under 1,200 watts.
Furthermore, ensure adequate cable sizing prevents voltage drop and overheating. For typical house battery connections carrying 50-100 amps, use minimum 2 AWG cable for runs under 5 feet. Undersized wiring represents a common mistake that degrades performance and creates fire hazards.
Intermediate Battery Configurations
As your off-grid ambitions grow, expanding to multiple batteries increases capacity and runtime. Properly connecting batteries in series, parallel, or series-parallel configurations requires understanding voltage and capacity relationships to avoid damaging your investment.
Parallel vs. Series Connections
Parallel connections join batteries positive-to-positive and negative-to-negative, maintaining system voltage while adding capacity. Two 6V 200Ah batteries in parallel create a 6V 400Ah bank. This configuration works when you need increased amp-hours at the same voltage.
Series connections link the positive terminal of one battery to the negative terminal of the next, adding voltages while maintaining capacity. Two 6V 200Ah batteries in series produce 12V at 200Ah. Golf cart batteries, which are 6V units, always require series connection to achieve 12V system voltage.
The critical rule: never mix battery types, ages, or capacities within a bank. Mismatched batteries charge and discharge at different rates, causing the weaker units to overwork and fail prematurely. When expanding an existing bank, replace all batteries simultaneously with identical units.
Building a Two-Battery Bank
The most common intermediate upgrade involves adding a second battery identical to your existing unit. Connect them in parallel using appropriately sized cables of equal length between corresponding terminals. This equal-length approach ensures balanced current distribution between batteries, preventing one from shouldering disproportionate load.
Position batteries as close together as practical, minimizing cable runs and voltage drop. Secure both units firmly since battery banks increase weight substantially—two Group 27 AGM batteries weigh approximately 140 pounds combined. Additionally, ensure adequate ventilation around batteries, particularly for flooded types that release hydrogen during charging.
Advanced Battery Systems and Integration
Experienced RVers frequently build sophisticated electrical systems rivaling or exceeding residential capabilities. These advanced setups integrate large lithium banks, multiple charging sources, high-capacity inverters, and comprehensive monitoring to enable true off-grid independence for extended periods.
High-Capacity Lithium Banks
Building a 400-600Ah lithium battery bank transforms your RV into a self-sufficient basecamp capable of running air conditioning, induction cooking, and power tools without generator support. These systems typically comprise four to six 100-200Ah lithium batteries configured in parallel for 12V operation.
Each battery must include an integrated Battery Management System (BMS) protecting against over-voltage, under-voltage, over-current, and temperature extremes. When paralleling multiple lithium batteries, using models from the same manufacturer with identical BMS specifications prevents communication conflicts and ensures balanced charging.
The investment proves substantial—expect $3,000-$6,000 for batteries alone, plus additional costs for upgraded inverters, solar arrays, and distribution components. However, the result delivers unmatched freedom for serious boondockers who spend weeks away from hookups, particularly when combined with adequate solar charging.
Inverter Integration
Pure sine wave inverters convert 12V DC battery power into 120V AC current for running standard appliances without shore power or generator. Size your inverter based on simultaneous load requirements plus surge capacity for motor starting. A 2,000-3,000 watt inverter handles most demands short of air conditioning or electric heating.
Install the inverter as close to the battery bank as possible, using massive cable—typically 4/0 AWG or larger for 3,000W units—to minimize voltage drop at high current draws. Additionally, incorporate a battery temperature sensor that adjusts charging parameters based on actual battery temperature, optimizing charge acceptance and longevity.
Automated Transfer Switches
Transfer switches automatically route power from the optimal source—shore power, generator, or inverter—without manual intervention. When you plug into shore power, the switch instantly disconnects the inverter and supplies AC power directly from the pedestal. Disconnect shore power, and the switch seamlessly transfers loads back to the inverter.
This automation prevents accidentally running the inverter while on shore power (wasting energy through conversion losses) and eliminates the possibility of backfeeding shore power into your inverter. Quality automatic transfer switches respond in milliseconds, providing uninterrupted power to sensitive electronics during transitions.
Charging Methods and Systems
Maintaining battery charge requires strategic use of multiple input sources. Relying solely on shore power limits your flexibility, while integrating solar, alternator, and generator charging creates a robust system that keeps batteries healthy regardless of camping circumstances. Many full-timers find themselves rarely running generators after properly implementing multi-source charging.
Shore Power and Converter Charging
When connected to campground electricity, your RV’s converter charges the house batteries while simultaneously powering 12V loads directly. Older converters provide simple single-stage charging that maintains float voltage but never fully charges batteries. Modern multi-stage “smart” converters deliver bulk, absorption, and float phases that properly condition and maintain batteries.
Upgrading from a basic converter to a progressive dynamics, IOTA, or similar multi-stage unit costs $150-$400 and dramatically improves battery health. These units adjust charging voltage based on battery state, temperature, and chemistry, preventing the chronic undercharging that plagues factory-installed converters.
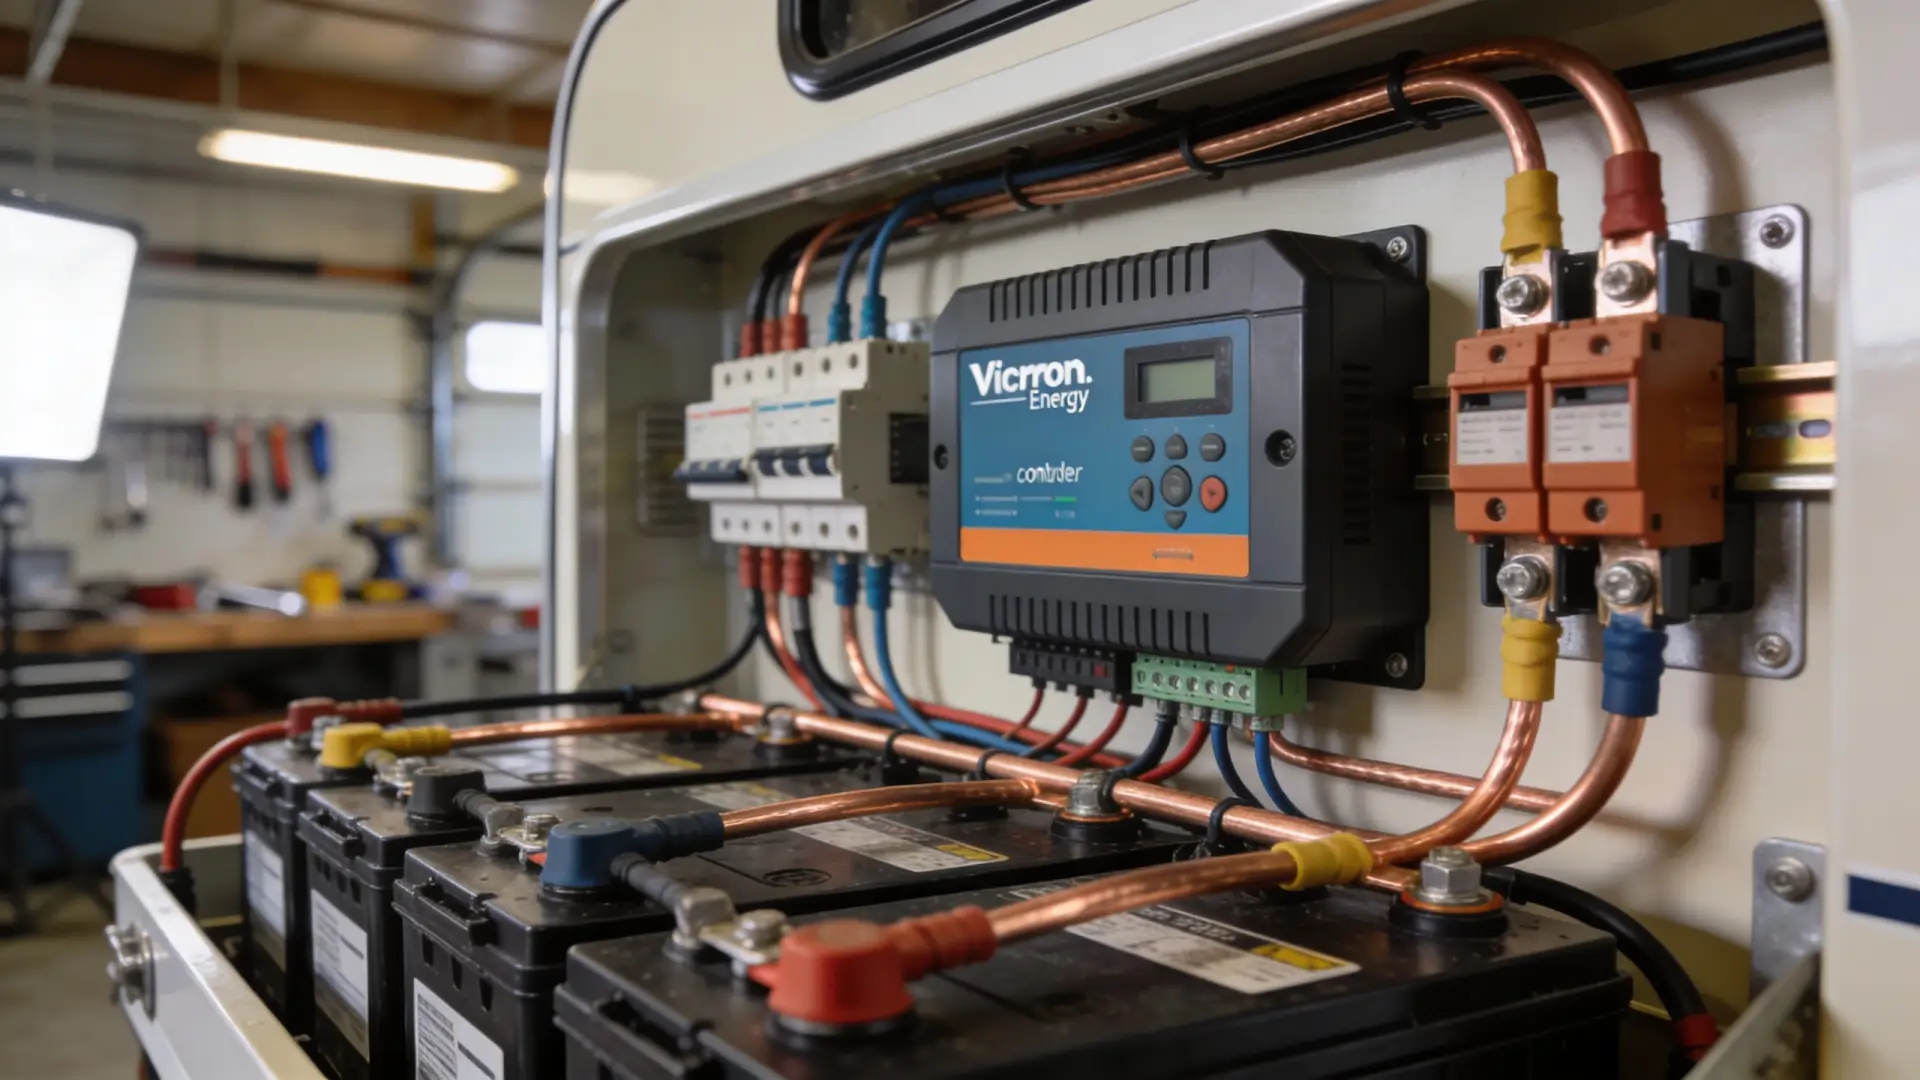
Solar Charging Systems
Solar panels represent the most popular off-grid charging solution, converting sunlight into electrical current that replenishes batteries daily. A basic 200-400 watt solar array paired with an MPPT charge controller provides substantial charging capacity for typical RV electrical loads, often eliminating generator dependency entirely during sunny weather.
Maximum Power Point Tracking (MPPT) controllers extract 20-30% more power from panels compared to cheaper PWM controllers by optimizing the voltage/current relationship. For systems over 200 watts, MPPT technology quickly pays for itself through increased harvest. Size your controller to handle your panel array’s maximum current output plus 25% safety margin.
Panel mounting options include rooftop permanent installation, portable panels deployed when parked, or flexible panels that conform to curved surfaces. Rooftop installation provides convenience and security but locks in panel orientation. Portable panels enable optimal positioning toward the sun throughout the day, significantly increasing daily energy harvest in winter or when parked in shade.
Alternator Charging
Your engine’s alternator can charge house batteries while driving, transforming road travel into productive charging time. However, factory-installed battery isolators or solenoids often prove inadequate for large lithium banks or provide minimal charging current due to voltage drop over long cable runs.
DC-to-DC chargers like Renogy or Victron models actively boost alternator output to appropriate battery charging voltage while limiting current to prevent alternator overload. These units safely charge lithium batteries from your alternator, prevent chassis battery depletion, and deliver optimal multi-stage charging profiles during transit. Installing a quality DC-to-DC charger costs $200-$500 but maximizes alternator charging effectiveness.
Generator Charging
Onboard generators provide reliable charging regardless of weather or driving schedule. However, generator runtime represents a compromise between charging needs, noise concerns, and fuel consumption. Running a 3,000-watt generator just to charge batteries wastes fuel since the converter only draws a fraction of available power.
Instead, combine generator runtime with high-load activities like air conditioning, cooking, or laundry. This approach maximizes the value of generator operation by addressing multiple power needs simultaneously. Additionally, modern inverter generators like Honda or Yamaha models run quieter and more efficiently than conventional generators, making them more neighbor-friendly during charging sessions.
Wiring and Connections Best Practices
Proper wiring separates reliable systems from troublesome ones. Undersized cables, loose connections, and inadequate fusing create voltage drop, power loss, overheating, and fire hazards. Therefore, investing in quality components and correct installation techniques pays dividends through superior performance and safety.
Cable Sizing and Voltage Drop
Wire gauge must correspond to current and distance to maintain voltage within acceptable limits. The American Wire Gauge (AWG) system uses smaller numbers for thicker wire—2 AWG cable carries significantly more current than 10 AWG cable over the same distance.
Calculate voltage drop using this formula: Voltage Drop = (2 × Length × Current × Resistance) / 1,000. Aim for less than 3% voltage drop on critical circuits. For example, a 50-amp circuit running 10 feet requires 6 AWG minimum to maintain acceptable voltage. Double that distance, and you need 4 AWG cable.
In practice, oversizing cables slightly costs little extra but provides margin for future expansion and ensures cool, efficient operation. Use marine-grade tinned copper cable for superior corrosion resistance in the humid RV environment. Never use automotive primary wire for battery connections—it lacks adequate insulation and ampacity for RV applications.
Terminal Connections and Crimping
Quality terminal connections require proper crimping tools and techniques. Battery cables use heavy-duty ring terminals secured with professional hydraulic or hammer crimpers. Inadequate crimping creates high-resistance connections that generate heat, degrade over time, and eventually fail—often at the worst possible moment.
After crimping, apply heat-shrink tubing over the connection to seal out moisture and provide strain relief. This extra step prevents corrosion and extends connection life substantially. Additionally, use anti-oxidation compound or dielectric grease on all terminal connections to inhibit corrosion and maintain conductivity.
Busbar Distribution
Rather than connecting multiple devices directly to battery terminals, use positive and negative busbars for distribution. These heavy copper bars provide organized connection points for all system components, simplifying troubleshooting and reducing clutter at the battery terminals.
Connect the battery positive to a fused busbar, then run individual fused circuits from the busbar to loads and charging sources. Similarly, connect the battery negative to a negative busbar serving as the common ground point. This configuration provides a clean, professional installation that’s easily modified when adding components later.
Monitoring and Power Management
Accurate battery monitoring prevents unexpected power depletion and enables informed decisions about power consumption and charging needs. Simple voltage meters provide basic information, while sophisticated battery monitors track state of charge, current flow, and historical data to maximize battery performance and lifespan.
Understanding State of Charge
Battery voltage correlates with state of charge, though the relationship varies by chemistry and load. A resting 12V lead-acid battery at 12.7V indicates full charge, 12.4V shows 75%, 12.2V represents 50%, and 12.0V signals 25% charge. Below 12.0V, the battery approaches damaging deep discharge territory.
However, voltage readings under load prove misleadingly low, while recently charged batteries show inflated voltage. Therefore, check voltage after batteries have rested at least one hour without charging or loads for accurate assessment. This resting voltage provides the most reliable state of charge indication without sophisticated monitoring.
Battery Monitors and Shunts
Dedicated battery monitors use shunts—precision resistors in the negative circuit—to measure actual current flow in and out of batteries. By tracking cumulative amp-hours consumed and replaced, these devices calculate accurate state of charge regardless of voltage fluctuations from loads or charging.
Popular monitors like Victron BMV or Bogart Engineering systems display remaining capacity, charge/discharge current, time to empty, historical data, and configurable alarms. This information proves invaluable for managing power consumption and determining when to run generators or reduce loads. Quality monitors cost $150-$400 but quickly pay for themselves through optimized battery management.
Remote Monitoring and Control
Modern systems increasingly incorporate smartphone connectivity, enabling remote monitoring and control from inside the RV or even across the country. Victron, Renogy, and Battle Born offer Bluetooth or WiFi-enabled components that display system status on mobile apps, providing real-time visibility into battery, solar, and charging performance.
Advanced users appreciate the ability to adjust charge parameters, monitor solar production, and review historical trends without visiting the battery compartment. Furthermore, remote monitoring proves particularly valuable for those storing their rigs seasonally, allowing periodic battery checks without physical visits. These features represent the cutting edge of RV power management, though they add cost to component selection.
Maintenance and Troubleshooting
Regular maintenance extends battery life dramatically and prevents failures during trips. Different battery types demand varying maintenance approaches, but all benefit from attention to charge state, cleanliness, and proper storage practices. Neglected batteries rarely achieve their rated lifespan, while well-maintained units frequently exceed specifications.
Flooded Battery Maintenance
Flooded lead-acid batteries require checking and replenishing water levels monthly during active use. Remove cell caps and inspect electrolyte level—it should cover the plates by approximately 1/4 inch. Add only distilled water, never tap water containing minerals that contaminate electrolyte and reduce performance.
Additionally, equalize flooded batteries quarterly by applying controlled overcharge that balances cell voltages. This process requires a specialized charger with equalization mode and should only be performed on flooded batteries, never sealed AGM or lithium units. Equalization prevents stratification where acid concentration varies between the top and bottom of cells.
AGM and Lithium Maintenance
Sealed AGM batteries require minimal maintenance beyond keeping connections clean and tight and avoiding deep discharge. Never attempt to open AGM batteries or add water—they’re factory sealed for life. However, periodically inspect terminals for corrosion and test voltage to confirm the charging system maintains proper levels.
Lithium batteries similarly need little maintenance but benefit from periodic cell balancing using the BMS balancing function. Additionally, avoid storage at full charge for extended periods—maintaining lithium batteries at 50-70% state of charge during off-season storage maximizes longevity. Unlike lead-acid batteries that benefit from storage at full charge, lithium chemistry prefers partial charge for long-term storage.
Common Problems and Solutions
Battery issues typically manifest as reduced capacity, inability to hold charge, or physical damage like swelling or leaking. Sulfation—the formation of lead sulfate crystals—represents the leading cause of premature lead-acid battery death, resulting from chronic undercharging or storage in discharged states.
Specialized desulfation chargers can sometimes recover mildly sulfated batteries, though severely damaged units require replacement. Swollen or bulging battery cases indicate overcharging, thermal runaway, or internal failures—replace these batteries immediately as they pose fire and explosion risks. Finally, batteries showing rapid self-discharge or inability to accept charge have likely reached end of life and need replacement.
Testing individual cell voltages reveals weak cells in a battery bank. A fully charged 12V battery should show approximately 2.1V per cell, or 12.6V total. Cells reading significantly lower indicate internal failure. Unfortunately, one weak cell condemns the entire battery since cells connect in series—the weakest link limits overall performance. For those dealing with persistent electrical issues, our generator repair and maintenance guide covers additional troubleshooting approaches for comprehensive power system diagnostics.
Safety Considerations and Regulations
RV electrical systems operate at voltages and currents capable of causing fires, explosions, and serious injury when improperly installed or maintained. Following established safety practices and code requirements protects your investment and, more importantly, your family. Never take shortcuts with electrical safety—the consequences can prove catastrophic.
Fusing and Circuit Protection
Every positive connection to the battery bank must include appropriate overcurrent protection within 7 inches of the terminal. Use Class T fuses or circuit breakers rated for DC service at your system’s maximum current. A 3,000W inverter on a 12V system draws 250 amps—require a 300-400 amp breaker or fuse to provide adequate protection without nuisance tripping.
Similarly, install appropriately sized fuses on every branch circuit. Solar panels need fusing at the charge controller input, inverters require massive fuses at the battery connection, and individual loads benefit from inline fuses sized to cable capacity. This distributed protection approach isolates faults to affected circuits rather than catastrophic failures affecting entire systems.
Ventilation Requirements
Flooded lead-acid and some AGM batteries release hydrogen gas during charging—a colorless, odorless, highly explosive gas that accumulates in enclosed spaces. Battery compartments must ventilate to the exterior, ideally with battery boxes vented both high and low since hydrogen rises while heavier gases settle.
Never install flooded batteries inside living spaces or sealed compartments without proper ventilation. Even small amounts of accumulated hydrogen can ignite from sparks created by connecting or disconnecting terminals, potentially causing violent explosions. Lithium batteries don’t produce hydrogen under normal operation but should still be installed in ventilated areas to dissipate heat and provide cooling.
Grounding and Bonding
Proper grounding prevents electrical shocks and provides fault current paths that trip overcurrent protection. The negative battery terminal connects to chassis ground, which bonds to shore power ground when plugged in. This bonding ensures that any hot-to-chassis fault condition immediately trips the breaker rather than energizing the entire RV frame at dangerous voltage.
Additionally, periodically inspect ground connections for corrosion and tightness. Poor grounds create intermittent problems, erratic behavior, and potential shock hazards. Every 12V circuit should include a dedicated ground return path to the negative busbar rather than relying on chassis grounds that can prove unreliable over time.
Working Safely with Batteries
Always wear safety glasses and gloves when working around batteries, particularly lead-acid types containing corrosive sulfuric acid. Remove jewelry that could contact terminals and create spectacular short circuits. Work with one hand when possible, keeping the other hand away from grounded surfaces to prevent current flow through your chest.
Disconnect shore power and turn off battery disconnect switches before working on electrical systems. Use insulated tools and cover adjacent terminals with electrical tape when loosening connections to prevent accidental shorts. Finally, keep a Class B or ABC fire extinguisher readily accessible when working with batteries—electrical fires require specific extinguishing agents ineffective against ordinary combustible fires. If you’re undertaking major electrical work as part of comprehensive upkeep, consult our detailed RV maintenance checklist to ensure you’re addressing all critical systems.
Frequently Asked Questions
How long do RV batteries last before replacement?
Flooded lead-acid batteries typically last 3-5 years with proper maintenance, AGM batteries extend to 4-7 years, and lithium batteries often exceed 10 years of service. However, actual lifespan depends heavily on depth of discharge cycles, charging practices, and storage conditions. Batteries subjected to repeated deep discharge or chronic undercharging fail prematurely regardless of chemistry.
Can I mix different battery types in my RV?
Never mix battery chemistries, ages, or capacities within a single bank. Different battery types charge and discharge at incompatible rates, causing the weaker units to overwork and fail while preventing stronger batteries from reaching full potential. Additionally, lithium and lead-acid batteries require fundamentally different charging profiles that cannot coexist on the same charging system without damage.
What size battery bank do I need for boondocking?
Calculate your daily amp-hour consumption by listing all devices and their runtime, then multiply by the number of days between charges. For lead-acid batteries, double this figure since you should only discharge to 50%. Most couples boondocking comfortably for 2-3 days need 400-600Ah of lead-acid capacity or 200-300Ah of lithium capacity, assuming minimal solar input. Conservative sizing


One comment on “RV Battery Setup Guide (Beginner to Advanced)”