
So, you’re thinking about going solar for your RV boondocking adventures? That’s a smart move! It can really free you up to explore those off-grid spots without constantly worrying about generator noise or running out of battery. The good news is, you don’t need to be an electrical engineer to get a simple, effective solar setup running. This guide focuses on the basics to get you powered up for quiet nights under the stars.
Table of Contents
What You Actually Need: The Core Components
At its heart, an RV solar system for boondocking is pretty straightforward. It’s about capturing sunlight, storing that energy, and then using it to power your RV’s appliances. Here’s the breakdown of what you’ll need to get started:
Solar Panels: Your Sunshine Catchers
These are the most visible part of your system and what convert sunlight into electricity. For simple boondocking setups, you’ll likely be looking at rigid or flexible panels.
Rigid Panels: The Workhorses
These are the classic, framed solar panels. They’re generally more durable, often offer a better power-to-price ratio, and are typically mounted permanently on your RV roof.
- Pros: Durable, can be more cost-effective for larger wattages, often come with a longer warranty.
- Cons: Can be bulkier, require secure mounting, can be damaged by hail or impact if not careful.
- What to look for: Pay attention to wattage (how much power they generate) and voltage. For most 12V RV systems, you’ll want panels that output around 18-22V.
Flexible Panels: The Lightweight Options
These are thinner, lighter, and can even be a bit bendy. They’re great if you’re concerned about weight or want more mounting flexibility, like attaching them to an awning.
- Pros: Lightweight, low profile, can be mounted in more places, less susceptible to wind uplift if properly secured.
- Cons: Can be more expensive per watt, generally have a shorter lifespan, can be damaged by abrasion or excessive flexing.
- What to look for: Similar to rigid panels, wattage and voltage are key. Ensure they are designed for outdoor use and can withstand UV exposure and temperature fluctuations.
Charge Controller: The Brains of the Operation
This little box is crucial. It regulates the flow of electricity from your solar panels to your batteries, preventing overcharging and protecting your batteries from damage. Think of it as the lifeguard for your batteries.
PWM (Pulse Width Modulation) Controllers: The Budget-Friendly Choice
These are simpler and less expensive. They’re a good starting point for smaller systems with one or two panels.
- How it works: PWM controllers essentially connect and disconnect the solar panels rapidly to maintain the battery voltage. It’s a bit like turning a tap on and off very quickly.
- Pros: Affordable, simple to set up and use.
- Cons: Less efficient than MPPT, especially in colder temperatures or when panel voltage is much higher than battery voltage. They can also generate more heat.
- Best for: Smaller battery banks and a limited number of panels.
MPPT (Maximum Power Point Tracking) Controllers: The Efficiency King
These are more advanced and more expensive, but they extract significantly more power from your solar panels, especially in less-than-ideal conditions (cloudy days, varying temperatures).
- How it works: MPPT controllers actively find the “maximum power point” of your solar array – the voltage and current combination that produces the most watts. They can convert higher panel voltages down to the battery voltage more efficiently.
- Pros: Much more efficient (often 10-30% more), better performance in varying light conditions and temperatures, can handle higher panel voltages.
- Cons: More expensive, slightly more complex to understand.
- Best for: Larger systems, maximizing power output, and when you want to get the most bang for your buck from your panels. For boondocking where every watt counts, MPPT is often the preferred choice.
Batteries: Storing Your Sunshine
Your batteries are where the captured solar energy is stored so you can use it when the sun isn’t shining. This is arguably the most important component for boondocking.
Deep Cycle Lead-Acid Batteries: The Traditional Option
These are the most common and generally the most affordable upfront. They’re designed to be discharged and recharged repeatedly.
- Flooded Lead-Acid (FLA): The most basic type. They require periodic maintenance (checking and topping up electrolyte levels) and need to be installed where ventilation is good as they can off-gas.
- Pros: Lowest initial cost, widely available, robust.
- Cons: Require maintenance, can be heavy, can be damaged by deep discharges, need ventilation.
- Sealed Lead-Acid (SLA) / AGM (Absorbed Glass Mat): These are maintenance-free and sealed, meaning you don’t need to check water levels. They are spill-proof and can be mounted in various orientations.
- Pros: Maintenance-free, spill-proof, better performance for quick discharges than FLA.
- Cons: More expensive than FLA, can still be damaged by very deep discharges.
- Gel Batteries: Another type of sealed lead-acid battery, known for good performance in fluctuating temperatures.
- Pros: Maintenance-free, good temperature tolerance.
- Cons: Generally more expensive and can be sensitive to overcharging.
Lithium Iron Phosphate (LiFePO4 or LFP) Batteries: The Premium Choice
These are the modern champions for RV solar. While they have a higher upfront cost, the benefits often outweigh it for boondockers.
- Pros: Lighter weight, can be discharged much deeper (80-100%) without damage, last much longer (thousands of cycles vs. hundreds for lead-acid), faster charging, more stable voltage output.
- Cons: Higher upfront cost, may require a specialized charge controller or battery management system (BMS) which is usually built-in.
- Why they’re great for boondocking: The ability to use nearly their full capacity means you can run your systems for longer between charges. Their longer lifespan also means less frequent replacement.
You’ll need to decide on the amp-hour (Ah) capacity of your battery bank. This is a measure of how much energy it can store. For example, a 100Ah battery can theoretically provide 1 amp for 100 hours, or 10 amps for 10 hours.
Wiring and Connectors: The Unsung Heroes
You can’t connect anything without these! Proper gauge wiring and connectors are essential for safety and efficiency.
Wire Gauge: Sizing Matters
The thickness of your wires (gauge) is critical. Too thin, and you’ll have voltage drop (loss of power) and overheating, which is a fire hazard.
- Rule of thumb: The longer the wire run and the higher the amperage, the thicker the wire needs to be.
- Where to find charts: You can easily find wire gauge charts online that are specific to RV solar systems. Look for charts that consider both voltage drop and ampacity (how much current a wire can safely carry).
- Don’t skimp: Always err on the side of thicker wire if you’re unsure.
Connectors: The Plug-and-Play Bits
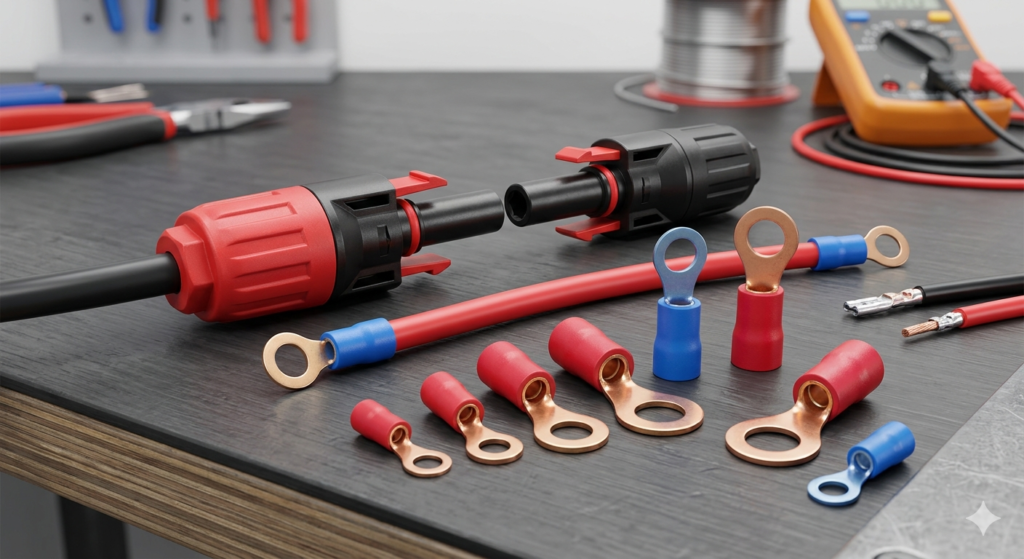
These are what actually link your components together. For solar, you’ll often see MC4 connectors for solar panel connections.
- MC4 Connectors: These are the standard weatherproof connectors for solar panels. They’re designed for easy, secure connections and are very durable.
- Ring Terminals: These are used to connect wires to battery terminals and charge controllers. Make sure they are the correct size for the bolts on your batteries and controller.
- Crimping: Using a proper crimping tool is vital to ensure a secure connection with ring terminals. Loose connections are a common cause of problems.
For those interested in enhancing their boondocking experience with a simple RV solar setup, a great resource is the article titled “Understanding the Basics of RV Solar Systems.” This comprehensive guide covers essential information about solar power systems specifically designed for RVs, making it easier for beginners to grasp the fundamentals and implement an effective solar solution. You can read the article here: Understanding the Basics of RV Solar Systems.
Sizing Your System: How Much Power Do You Really Need?
This is where we stop talking about gadgets and start talking about your actual RV lifestyle. To figure out what size solar system you need, you need to estimate your daily energy consumption.
Estimating Your Daily Watt-Hour Usage
This is the most important step to avoid being underpowered or overspending. You need to figure out how much electricity your appliances use on a typical day.
1. List Your Appliances: What Do You Turn On?
Go through your RV room by room and list everything that uses electricity. Don’t forget the small stuff.
- Lights (LEDs use way less than older bulbs)
- Refrigerator (especially if it’s an electric/gas RV fridge where you use electric)
- Fans (ceiling fans, portable fans)
- Water pump
- TV and streaming devices
- Laptop/phone chargers
- Microwave (use sparingly if you’re boondocking – they’re power hogs!)
- Coffee maker
- Inverter (if you use one for AC appliances – this is also a major power draw)
- Anything else you plug in or turn on!
2. Find Their Wattage: How Much Juice Do They Drink?
Most appliances have a label that indicates their wattage. If it only shows voltage and amperage (A), you can calculate wattage: Watts (W) = Volts (V) x Amps (A).
- Example: A light bulb saying “12V, 2A” uses 12V * 2A = 24 Watts.
- Inverters: If you use an inverter, remember that they themselves consume power to operate, and they’re not 100% efficient. Add a buffer for inverter draw.
3. Estimate Daily Usage Hours: How Long Do You Use Them?
Be realistic here. How many hours a day do you actually run each appliance?
- Lights: Maybe 4-6 hours total for all lights.
- Refrigerator: It runs constantly, but the compressor cycles on and off. For efficiency, it might run 1/3 to 1/2 of the time.
- Water pump: Likely only runs for a few minutes at a time when you need water. Add up approximate total run time per day.
- TV/Laptop: Maybe 2-4 hours.
4. Calculate Daily Watt-Hours (Wh): The Total Energy Bill
For each appliance, multiply its wattage by the estimated daily hours of use. Then, add all these numbers up.
- Daily Watt-Hours = (Appliance Wattage x Hours of Use per Day)
Let’s do a quick example for a few items:
- 2 x 5W LED Lights x 5 hours/day = 50 Wh
- RV Fridge (estimate 100W compressor x 8 hours/day ‘on’ time) = 800 Wh
- Water Pump (50W x 0.5 hours/day) = 25 Wh
- Total for these items = 875 Wh
This total number is your estimated daily watt-hour consumption.
Sizing Your Battery Bank: How Long Can You Go Off-Grid?
Once you know your daily Wh needs, you can size your battery bank.
- Factor in Depth of Discharge (DoD): You don’t want to drain your batteries completely, as this shortens their lifespan.
- Lead-acid: Aim for a maximum DoD of 50%.
- Lithium (LiFePO4): You can safely discharge them to 80-100%.
- Calculate Required Battery Capacity:
- For Lead-Acid: (Total Daily Wh) / (Max DoD %) x (Days of Autonomy) = Required Ah
- Example: (1000 Wh / 0.50 DoD) x 2 days = 4000 Wh total capacity needed.
- Then, convert Wh to Ah: 4000 Wh / 12V = 333 Ah. So you’d need at least three 100Ah lead-acid batteries.
- For Lithium: (Total Daily Wh) / (Max DoD %) x (Days of Autonomy) = Required Ah
- Example: (1000 Wh / 0.80 DoD) x 2 days = 2500 Wh total capacity needed.
- Then, convert Wh to Ah: 2500 Wh / 12V = 208 Ah. So you’d need at least a 200Ah LiFePO4 battery.
Sizing Your Solar Array: How Much Sunlight Do You Need?
Your solar array needs to be large enough to recharge your batteries each day, considering inefficiencies.
- Peak Sun Hours: This is the average number of hours per day where the sun’s intensity is equivalent to direct sunlight at solar noon. This varies greatly by location and season. You can find average peak sun hours for your region online. Let’s assume 4 peak sun hours for this example.
- Calculate Required Solar Wattage:
- Formula: (Total Daily Wh) / (Peak Sun Hours) / (System Efficiency Factor) = Required Solar Watts
- System Efficiency Factor: Account for losses in wiring, charge controller, and panel performance degradation. A good estimate is 0.75 to 0.85. Let’s use 0.80.
- Example: (1000 Wh) / (4 hours) / (0.80) = 312.5 Watts.
- So, for our example with 1000 Wh consumption and 4 peak sun hours, you’d want at least a 300-350 watt solar array to reliably recharge your batteries without relying on shore power or a generator.
Putting It All Together: Installation Basics
Now that you know what you need and how to size it, let’s touch on putting it all in.
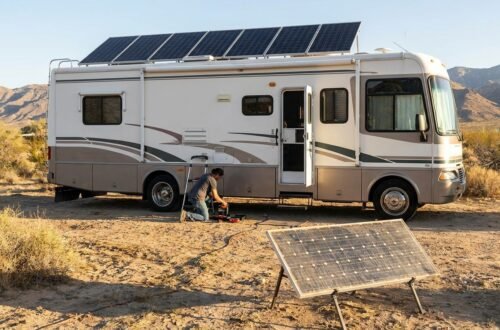
Mounting Your Panels: Secure and Sunny
The goal is to get your panels where they can see the most sun without being shaded.
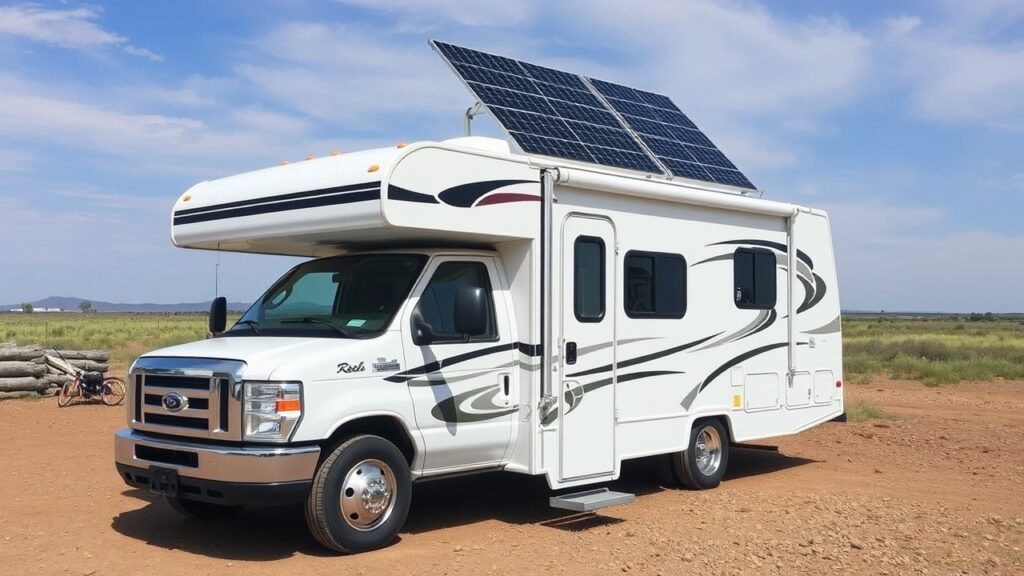
Roof Mounting: The Permanent Fixture
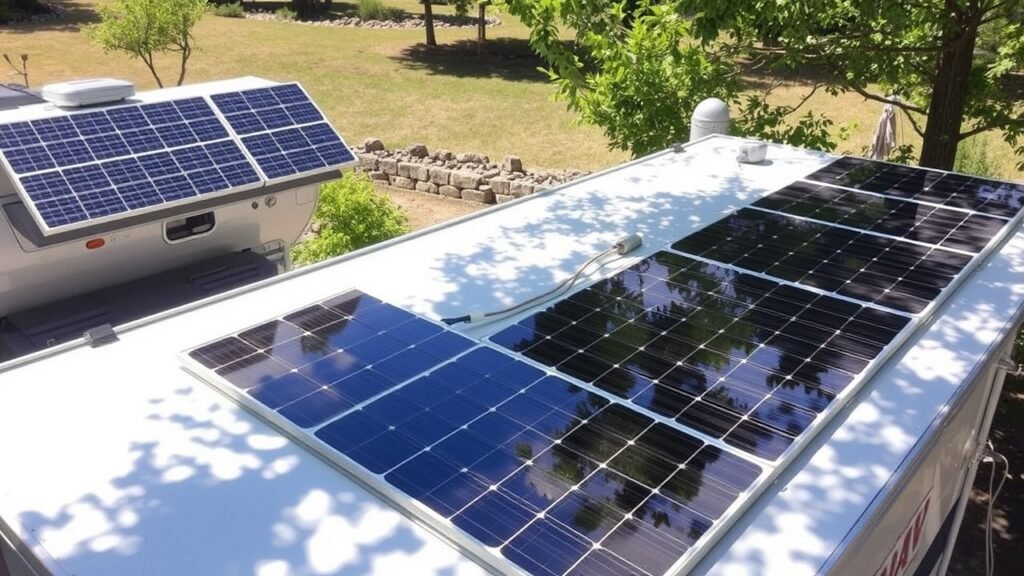
Most of us mount solar panels on the RV roof for convenience and safety.
- Considerations:
- Placement: Avoid areas where awnings, AC units, or vent pipes will cast significant shadows, especially during peak sun hours.
- Mounting Brackets: Use sturdy, marine-grade stainless steel or aluminum brackets designed for RV roofs. These often allow for some tilt to optimize sun angle, though for simple systems, a fixed mount is fine.
- Sealing: This is critical! Use a high-quality RV sealant (like Dicor self-leveling sealant) around every screw hole and seam to prevent leaks. Go over it multiple times.
- Wiring: Route your panel wires neatly and securely to a junction box or directly to your charge controller. Use conduit or protective sleeves for exposed wiring.
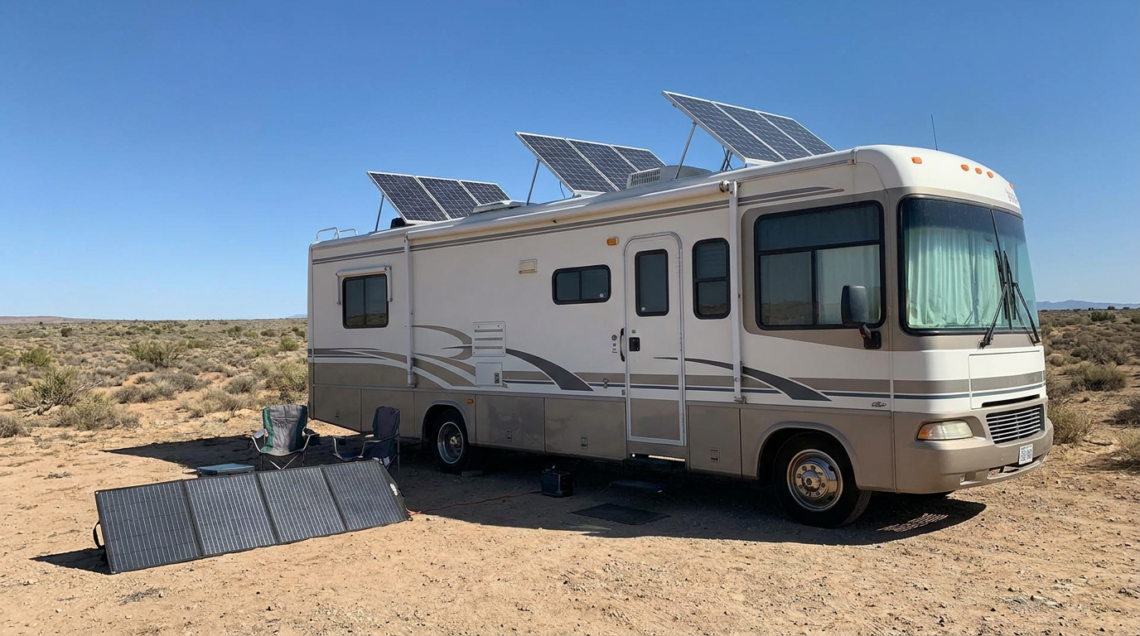
Portable Solar: Flexible and Mobile
If you want more flexibility or have a shaded parking spot, portable solar panels are an option.
- How it works: These are panels that can be unfolded and placed on the ground, angled towards the sun. They connect to your system via a long cable.
- Pros: Can be positioned for optimal sun, can be stored away when not in use, helps avoid roof clutter.
- Cons: Requires setup and take-down, can be a tripping hazard, need to be secured against wind.
- Connection: You’ll need a longer solar cable (often MC4 extension cables) to reach your charge controller inside.
Wiring Your Components: The Flow of Power
This is where those carefully chosen wires and connectors come into play.
Panel to Charge Controller: The Input
- Your solar panels should have output cables, typically with MC4 connectors.
- These connect to the “Solar” or “PV” input terminals on your charge controller.
- For MPPT controllers, you’ll connect the wires from your panels directly to the controller. For PWM, it’s similar, but ensure your panel voltage is in the correct range for your battery voltage.
Charge Controller to Batteries: The Management System
- This is a direct connection from the “Battery” terminals on your charge controller to your battery bank.
- **Crucially, wire the charge controller to the batteries before connecting the solar panels.** This allows the charge controller to sense the battery voltage and set itself up correctly.
- Use appropriately sized wires with ring terminals for a secure connection to the battery posts and controller terminals.
- Fuse it: Install an inline fuse between the charge controller’s battery output terminal and the battery bank. The fuse size should be appropriate for your charge controller’s rating (check the controller’s manual). This protects your system in case of a short circuit.
Batteries to Inverter/Loads: The Output
- If you have an inverter, it connects directly to your battery bank (usually with very thick cables, as inverters draw a lot of current).
- Your 12V DC loads (lights, pumps, etc.) will typically connect to either:
- The “Load” terminals on your charge controller (if it has them and they’re rated for your appliance draw). This offers some low-voltage disconnect protection for your batteries.
- Directly to your battery bank (via a fuse block for protection and organization).
Pre-Built Kits vs. DIY: What’s Right for You?
For a simple system, both approaches have their merits.
Pre-Built Solar Kits: The All-in-One Solution
Many companies offer RV solar kits. These typically include panels, a charge controller, and sometimes wiring.
- Pros:
- Convenience: Everything is chosen for you, simplifying the selection process.
- Compatibility: Components are generally designed to work together.
- Faster setup: Less time spent researching individual parts.
- Cons:
- Less Customization: You’re limited to what’s in the kit. The components might not be the absolute best fit for your specific needs.
- Potentially Higher Cost: Sometimes, buying individually can be cheaper if you find good deals.
- Lower Quality Components: Some budget kits might use lower-quality panels or controllers. Always check reviews.
Building Your Own (DIY) System: The Tailored Approach
This involves selecting each component individually and putting it all together.
- Pros:
- Flexibility: You can choose top-quality components that perfectly match your power needs and budget.
- Cost Savings: With careful shopping, you can often save money.
- Deeper Understanding: You learn a lot more about how the system works, which is invaluable for troubleshooting.
- Cons:
- Requires Research: You need to do your homework to ensure compatibility and proper sizing.
- More Time-Consuming: The selection and ordering process takes longer.
- Potential for Errors: If you’re not careful with sizing or connections, you could have problems.
For a simple boondocking setup, a well-chosen kit can be a great starting point. However, if you’ve done your homework on sizing your system and feel comfortable researching specific component reviews, going the DIY route often leads to a more optimized and potentially more reliable setup.
For those interested in enhancing their RV boondocking experience, a simple solar setup can make a significant difference in enjoying off-grid adventures. If you’re looking for guidance on how to create an efficient and cost-effective solar system for your RV, you might find this article on RV solar setups particularly helpful. It covers essential components and tips for installation, ensuring you have the power you need while exploring the great outdoors. To learn more about optimizing your RV solar setup, check out this informative resource here.
Troubleshooting Common Issues: When Things Go Wrong
Even with simple systems, occasional hiccups can occur. Here are a few common ones:
No Power from Panels
- Check Connections: Are all wires securely connected, particularly at the panels, charge controller, and batteries? Are MC4 connectors fully seated?
- Panel Orientation/Shading: Is there anything blocking the sun from your panels (trees, your own RV)? Even partial shading can drastically reduce output.
- Charge Controller Display: What does your charge controller say? Many have displays that indicate if they’re receiving power from the panels. Check for error codes.
- Fuses: Is the main fuse between the charge controller and the battery blown? Is there a fuse between your panels and the charge controller (less common for simple systems but possible)?
- Panel Damage: Inspect panels for any visible damage.
Batteries Not Charging Fully
- Undersized Solar Array: You might not have enough solar wattage to keep up with your consumption and recharge time, especially during periods of less sun.
- Battery Bank Issues: Are your batteries old and nearing the end of their life? Are they healthy?
- Charge Controller Not Functioning: Is the charge controller properly recognizing and charging the batteries? Check its settings.
- Excessive Load: Are you drawing more power than the solar is providing and recharging?
- Wiring Losses: Are your wires too thin or too long, causing significant voltage drop?
Inverter Not Working
- Battery Voltage: Is the battery voltage too low for the inverter to operate? Most inverters have a low-voltage cutoff to protect batteries.
- Inverter Fuse: Check the fuse on the inverter itself or the fuse/breaker from the battery to the inverter.
- Inverter Overload: Are you trying to power something that draws more watts than your inverter can handle?
- Loose Connections: Inverters draw a lot of current, so ensure all connections to the battery are clean and tight.
Remember, a good multimeter is your best friend for diagnosing electrical issues. Learning how to use it to check voltage and continuity will save you a lot of guesswork.
By focusing on these core principles and understanding your own power needs, you can build a simple RV solar setup for boondocking that truly unlocks the freedom of off-grid living. It’s less about complex tech and more about smart planning and reliable components. Happy travels!
FAQs
What is an RV solar setup for boondocking?
An RV solar setup for boondocking is a system that uses solar panels to generate electricity for an RV’s appliances and devices while camping in remote areas without access to traditional power sources.
How does a simple RV solar setup work?
A simple RV solar setup typically consists of solar panels, a charge controller, a battery bank, and an inverter. The solar panels collect sunlight and convert it into electricity, which is then stored in the battery bank. The charge controller regulates the flow of electricity to the batteries, while the inverter converts the stored DC power into AC power for use in the RV.
What are the benefits of using an RV solar setup for boondocking?
Using an RV solar setup for boondocking allows campers to have a reliable source of electricity without relying on noisy generators or being tethered to electrical hookups. It also provides a more environmentally friendly and sustainable way to power RV appliances and devices while enjoying the great outdoors.
What size solar setup do I need for boondocking?
The size of the solar setup needed for boondocking depends on the energy consumption of the RV’s appliances and devices, as well as the amount of sunlight available in the camping area. A general rule of thumb is to calculate the total wattage of the devices you plan to power and then size the solar setup accordingly.
Are there any maintenance requirements for an RV solar setup?
Regular maintenance for an RV solar setup includes keeping the solar panels clean and free of debris, checking the connections and wiring for any signs of wear or damage, and monitoring the battery bank’s charge levels. It’s also important to periodically inspect the system for any potential issues and make any necessary repairs or replacements.


One comment on “Effortless RV Solar: The Simple Setup for Perfect Boondocking”