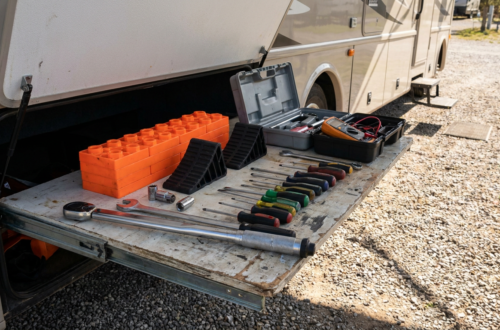
RV batteries can be a bit of a mystery when you’re new to the nomadic lifestyle, but getting them right is crucial for a smooth trip. The most common RV battery mistakes beginners make often revolve around neglecting regular checks, improper charging, and not understanding how their specific battery type works. Simply put, think of your RV batteries like a small, self-contained power plant – it needs consistent care and proper handling to keep your lights on and your fridge cold.
Table of Contents
Neglecting Battery Health Checks
One of the easiest ways to shorten your battery’s life is to just set it and forget it. Batteries aren’t magic boxes that just keep working without any input from you.
Skipping Regular Visual Inspections
Batteries need a once-over just like the rest of your RV. It’s pretty simple to do, but often overlooked.
Why it Matters
Checking your batteries every 1-2 months isn’t overkill, especially for lead-acid types. You’re looking for common warning signs:
- Corrosion: White or greenish build-up on the terminals (the metal posts where cables attach) is a sign of corrosion. This can impede the flow of electricity, making charging less efficient and delivering less power.
- Leaks: Any liquid around the battery, other than a bit of condensation, is a red flag. This could be electrolyte leaking, which is corrosive and dangerous.
- Swelling, Cracks, or Bulges: If your battery casing looks deformed in any way – swollen sides, cracks in the plastic, or bulging tops – it’s a strong indicator of internal damage and potential failure. This is particularly dangerous as it can lead to thermal runaway in some battery types, which is a fire hazard.
What to Do
Make it a habit. When you check your tire pressure or water levels, glance at your batteries. If you spot corrosion, carefully clean it with a battery brush and a mixture of baking soda and water (for lead-acid). For leaks, swelling, or cracks, it’s usually time to replace the battery and investigate the cause, as these aren’t typically fixable issues.
Ignoring Voltage Monitoring
Just because your lights are on doesn’t mean your batteries are happy. Voltage is your window into the battery’s state of charge, and ignoring it can lead to serious, irreversible damage.
The Deep Discharge Trap
Batteries, especially lead-acid ones, don’t like to be fully drained. Every time you deep-discharge a lead-acid battery (meaning draining it below 50% capacity), you shave a significant amount of life off it. Doing it repeatedly will kill it quickly.
What Voltage Tells You
A simple voltmeter or a built-in monitor can give you crucial information. For a 12V lead-acid battery:
- 12.7V or higher: Fully charged.
- 12.4V: Roughly 75% charged.
- 12.2V: Approximately 50% charged – time to recharge!
- 12.0V or lower: Deeply discharged and starting to suffer damage.
For lithium (LiFePO4) batteries, the voltage curve is much flatter. They’ll hold around 13.X volts until they’re almost empty, then drop off sharply. This means a simple voltage reading isn’t as reliable for determining charge level on lithium – you’ll want a battery monitor that tracks amp-hours in and out for an accurate state of charge. However, monitoring that voltage drop-off is still critical to prevent running them completely dry, which can also cause damage.
How to Monitor
Many RVs have built-in monitors, but a cheap handheld voltmeter is a good backup. Regularly check your battery voltage, especially when boondocking or storing your RV. This helps you know when to conserve power or initiate charging.
When it comes to RVing, beginners often overlook the importance of properly maintaining their battery systems, leading to common mistakes that can affect their overall experience. To enhance your RV adventures, it’s also essential to know where to find the best free campsites while boondocking. For more information on this topic, check out this helpful article on the 6 best boondocking apps for finding free campsites. This resource can help you make the most of your RV trips while ensuring your battery is in top shape for all your off-grid adventures.
Improper Battery Mixing and Matching
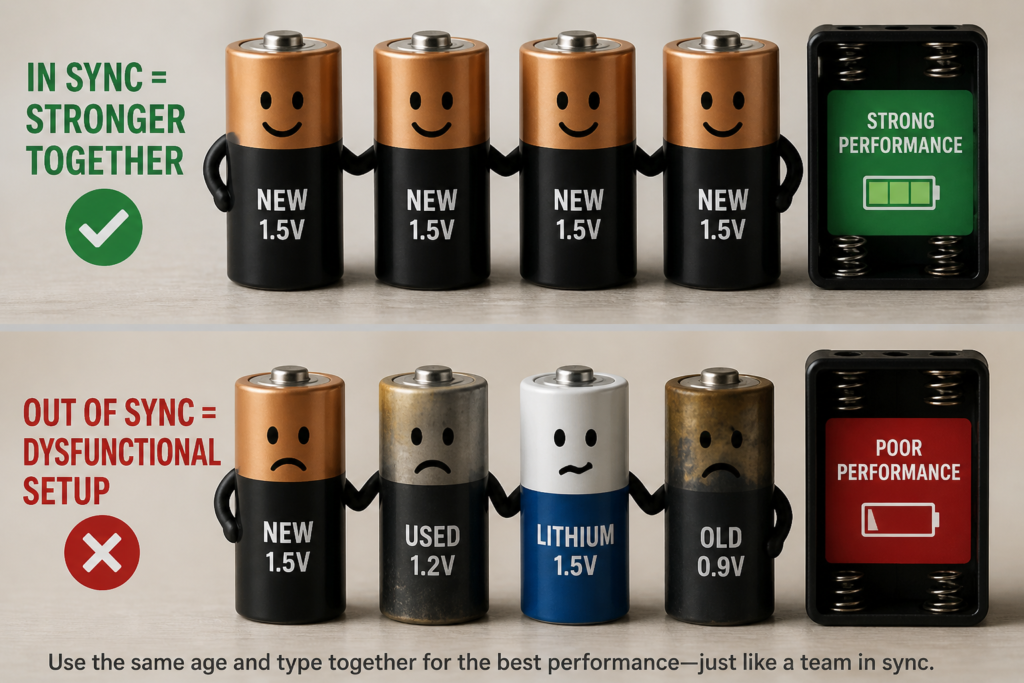
Batteries are like a team; they work best when they’re all in sync. Mixing different ages or types can lead to a dysfunctional setup.
Mixing Old and New Batteries
This is a really common and costly mistake. You might think replacing just the “bad” battery in a bank is smart, but it often backfires.
The Weakest Link Problem
When you connect multiple batteries together (in parallel or series), they ideally share the load and charge equally. If you introduce a brand-new battery into a bank with older, more worn-out batteries, the older batteries will effectively drag down the performance of the new one. The new battery will try to overcompensate, working harder and being subjected to less-than-ideal charging and discharging patterns, which shortens its own life. The older batteries also won’t get a proper charge because the newer, healthier one will reach its full state faster, causing the charger to cut off prematurely.
Best Practice
If one battery in a bank is failing, it’s generally best practice to replace all batteries in that bank. It’s an upfront cost, but it ensures uniform performance and maximizes the lifespan of your entire battery system.
Mixing Different Battery Types
Each battery chemistry (lead-acid, AGM, gel, lithium) has different charging requirements and discharge characteristics.
Why it Doesn’t Work
You simply cannot mix different battery types in a single bank. For example, connecting a lead-acid battery to a lithium battery is a recipe for disaster. The charging voltages, current tolerances, and discharge profiles are completely different. A charger designed for lead-acid will damage a lithium battery, and vice versa. Even mixing different brands or capacities of the same type can sometimes lead to inefficiencies and shortened lifespan, though it’s less catastrophic than mixing chemistries.
What to Do
Stick to one type of battery within an RV’s battery bank. If you’re upgrading from lead-acid to lithium, it’s an all-or-nothing conversion, often requiring changes to your converter/charger, solar charge controller, and sometimes even your alternator’s charging profile.
Charging Blunders
Charging seems straightforward, but there are nuances that can significantly impact battery health.
Using the Wrong Charger Type
Not all chargers are created equal, and using the wrong one is a fast track to battery damage.
The “Dumb” Charger Problem
Older, single-stage chargers or cheap car battery chargers aren’t suitable for RV deep-cycle batteries. They often just pump a constant voltage, which can overcharge and boil off electrolyte in lead-acid batteries, or fail and damage sensitive lithium batteries.
The Smart Charger Solution
Modern RVs and informed owners use “smart” or “multi-stage” chargers. These chargers typically have three stages:
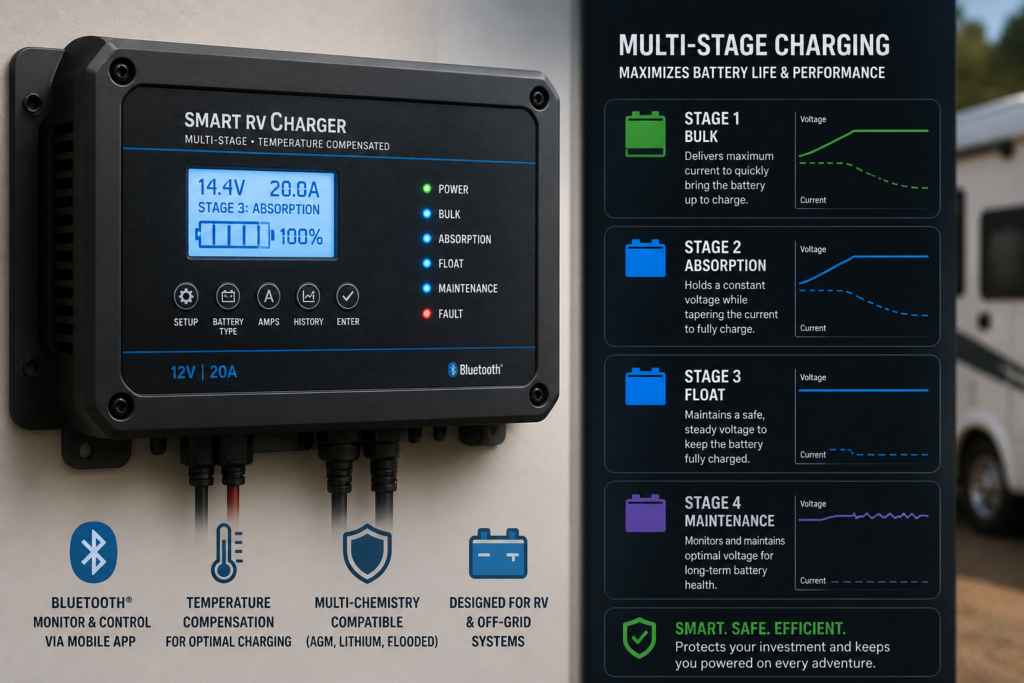
- Bulk Stage: Delivers maximum current to rapidly bring the battery to about 80-90% charge.
- Absorption Stage: Reduces current and carefully brings the battery to 100% charge at a constant, slightly lower voltage. This prevents overcharging.
- Float Stage: Maintains a very low, constant voltage to compensate for self-discharge, keeping the battery fully charged without damaging it.
For lithium batteries, you need a charger specifically designed for LiFePO4. These chargers have different voltage profiles and sometimes a “pre-charge” stage for deeply discharged lithiums.
What to Do
Ensure your RV’s converter (the device that converts shore power to 12V DC for charging) is compatible with your battery type. If you have lead-acid, ensure it’s a multi-stage charger. If you upgrade to lithium, you will almost certainly need to upgrade your converter/charger to one that supports LiFePO4 charging profiles. Many modern converters have dip switches to select the battery type.
Overcharging / Leaving Batteries Plugged In Too Long
While float charging is good, excessive constant high-current charging is not.
The Constant “On” Myth
Leaving your RV plugged into shore power for months on end isn’t always ideal, especially if your converter isn’t truly smart or if you have older lead-acid batteries. A poorly regulated charger can slowly overcharge batteries, leading to electrolyte loss (in flooded batteries) or internal damage (in sealed batteries).
What Happens
Overcharging causes excessive gassing and heat in lead-acid batteries, which boils off the water in the electrolyte. If not refilled, the plates will be exposed and damaged. It can also cause internal corrosion and even plate separation. While lithium batteries are less prone to damage from continuous float charging if the charger is designed for them, they generally don’t benefit from being constantly topped off once full.
How to Prevent It
For lead-acid batteries, ensure your converter/charger has a proper float stage. If you’re leaving the RV plugged in for extended periods, check the electrolyte levels (if applicable) regularly. Some RVers choose to periodically disconnect shore power for a day or two to let the batteries cycle a bit, or use a battery maintainer designed for long-term storage rather than the RV’s main converter. For lithium, once fully charged, a good LiFePO4 charger will simply stop charging until the voltage drops.
Discharging Do’s and Don’ts
How you use your battery – how deeply you discharge it – is just as important as how you charge it.
Over-Discharging Lead-Acid Batteries
This is arguably the most common killer of lead-acid RV batteries.
The 50% Rule
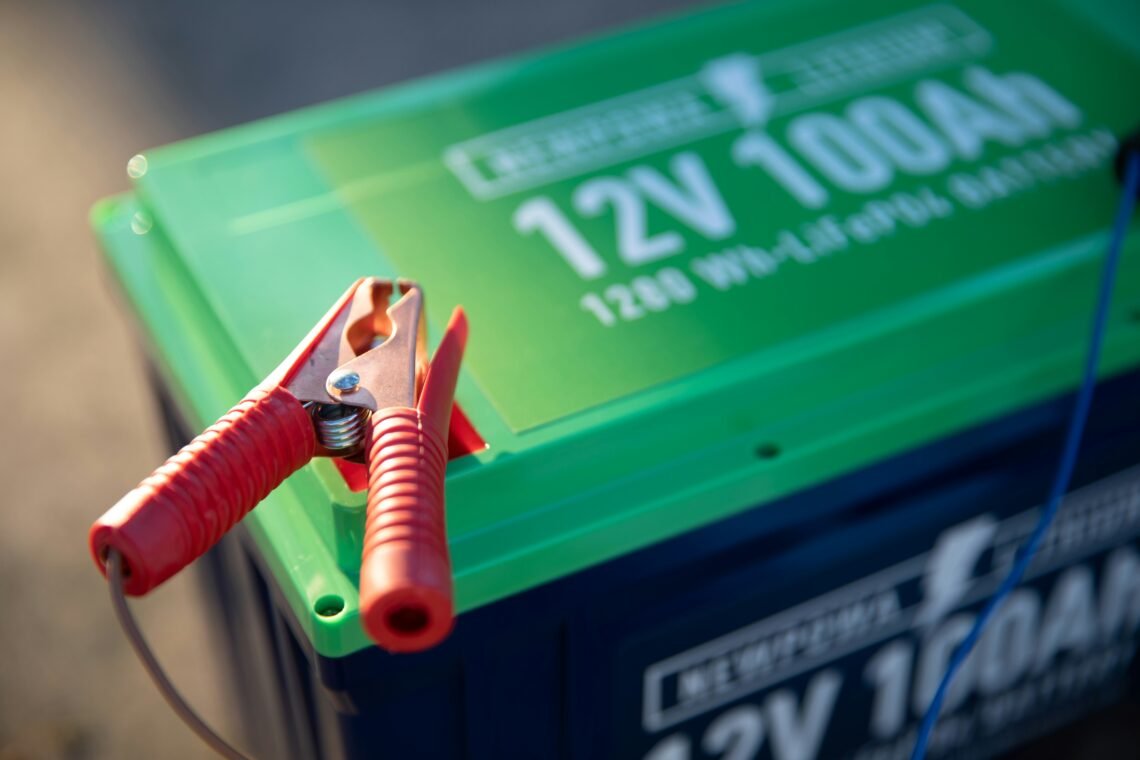
Lead-acid batteries (both flooded and AGM) are designed for optimal longevity when you only discharge them to 50% of their capacity. This means if you have a 100 Ah (Amp-hour) lead-acid battery, you should only use about 50 Ah before recharging. Discharging them further causes sulfation, a build-up of lead sulfate crystals on the battery plates, which impedes chemical reactions and reduces capacity. Repeated deep discharges will drastically reduce the battery’s lifespan.
Why Lithium is Different
This is where lithium (LiFePO4) batteries shine. They can be safely discharged to 80-100% of their capacity without significant damage, and often have a built-in Battery Management System (BMS) that will automatically disconnect them before they are critically low. This feature makes them much more “user-friendly” in terms of discharge depth.
Monitor Your Usage
Use your voltage monitor or battery monitor (Shunt) to keep an eye on your lead-acid battery’s state of charge. When you hit that 50% mark (around 12.2V for a 12V system), it’s time to recharge, even if it means running your generator. Don’t push it.
Under-Charging After Use
Just as bad as over-discharging is not fully recharging your batteries.
The Partial Charge Cycle
Consistently leaving lead-acid batteries at a partial state of charge (e.g., only charging them to 75% after every use) is detrimental. It accelerates sulfation and reduces capacity over time. The battery needs to go through a full charge cycle occasionally to “equalize” the cells and keep them healthy.
What to Do
After a period of use, especially heavy use, ensure your batteries get a full, complete charge. This might mean keeping them on shore power for longer than you think, or running your generator until your smart charger indicates the absorption or float stage. Don’t just charge them until you see green; let the charger complete its full cycle, especially for lead-acid.
When it comes to maintaining your RV, understanding the common battery mistakes beginners make is crucial for ensuring a smooth experience on the road. Many new RV owners overlook the importance of proper battery care, which can lead to issues down the line. To complement your knowledge about battery maintenance, you might find it helpful to explore tips on keeping your RV systems running efficiently. For instance, check out this insightful article on how to keep your RV water heater running smoothly, as it highlights essential maintenance practices that can enhance your overall RV experience.
Storage and Environmental Factors
Batteries don’t just sit dormant when your RV is parked; they’re constantly interacting with their environment.
Neglecting Maintenance During Storage
Parking your RV for the winter or for extended periods requires some battery considerations.
The Phantom Drain
Many RVs have small “phantom” loads – things like propane detectors, radio memory, clock, or even parasitic draws from smart appliances. These small draws, even with a battery disconnect switch engaged, can slowly drain your batteries over weeks or months. Some systems bypass the disconnect, making this problem even stealthier. A single RV battery can lose 5-10% of its charge per month just from self-discharge, plus any phantom draws.
The Damage
A battery left to deep discharge itself over winter will likely be severely damaged or completely dead by spring. Lead-acid batteries left in a discharged state can also freeze in cold temperatures, causing catastrophic damage to the casing and internal plates.
Storage Solutions
- Disconnect: The simplest step is to manually disconnect the battery terminals (usually the negative one first). This truly isolates the battery from all loads.
- Remove: Even better, remove the batteries from the RV entirely. Store them in a cool, dry place.
- Maintainer: Use a smart “trickle” charger or battery maintainer that is specifically designed for your battery type and has a float mode. This will keep the battery topped off without overcharging.
- Monitor: If storing in the RV, periodically check the voltage and top it off if needed, or better yet, use a dedicated battery maintainer.
Forgetting About Temperature Effects
Batteries don’t like extreme temperatures – hot or cold.
Temperature Swings
High temperatures accelerate chemical reactions within the battery, which can lead to faster degradation and shorter lifespan. Low temperatures reduce a battery’s effective capacity and make charging more challenging. Charging lead-acid batteries in freezing temperatures can be particularly damaging. Lithium batteries have specific temperature limits for charging, and their BMS will usually prevent charging below freezing to protect them.
Vibration
Road vibration, especially on rough roads, puts constant physical stress on battery components, particularly the internal plates and connections in lead-acid batteries.
Mitigating the Effects
- Location: If possible, store batteries in a protected compartment away from direct sunlight or extreme heat sources.
- Insulation: In colder climates, some RVers insulate their battery compartments or use battery heating mats to keep temperatures within an optimal range, especially for lithium batteries that require above-freezing temperatures for charging.
- Monitoring: Be aware that your battery monitor might show a lower capacity in very cold weather; this is normal, and capacity will return as temperatures rise.
- Secure: Ensure batteries are securely mounted in their trays to minimize vibration damage during travel.
Choosing the Wrong Battery Type
The battery that came with your RV might not be the best one for your camping style.
Not Matching Battery to Lifestyle
There are many battery types, and picking the right one is crucial for satisfaction and longevity.
The “One Size Fits All” Myth
Many RVs come standard with basic flooded lead-acid batteries. These are good, affordable workhorses if you mostly camp with shore power or run your generator frequently. But if you plan to boondock for extended periods, or demand a lot of power (like running an air conditioner off-grid), these basic batteries will quickly fall short.
Common Battery Types
- Flooded Lead-Acid (FLA): The most affordable. Require regular maintenance (checking and refilling electrolyte). Sensitive to deep discharges (50% rule). Good for moderate use.
- Absorbed Glass Mat (AGM): Sealed, maintenance-free version of lead-acid. More tolerant to vibration, better cold-weather performance than FLA, and can handle deeper discharges slightly better (though still adhere to the 50% rule for longevity). More expensive than FLA.
- Gel Batteries: Another sealed lead-acid type. Very tolerant of deep discharges but require specific, lower charging voltages and rates. Not as common in RVs due to slower charging and higher cost compared to AGM.
- Lithium Iron Phosphate (LiFePO4): The premium option. Lightweight, long lifespan, can be discharged deeply (80-100% capacity), faster charging, and excellent performance in varied temperatures (with a BMS). High upfront cost but can save money in the long run due to longevity and usable capacity. Requires compatible charging systems.
Making the Right Choice
Consider your power needs:
- Shore Power Camper: Flooded lead-acid is probably fine.
- Weekend Boondocker/Moderate Use: AGM offers a good balance of performance and maintenance.
- Extended Boondocker/High Power Needs: Lithium is likely your best bet for comfort and peace of mind, though it requires a higher initial investment and potential system upgrades.
Don’t just replace what you have without considering if it suits your actual camping habits. A little research here can save a lot of headaches and money down the road.
FAQs
What are some common mistakes beginners make with RV batteries?
Some common mistakes beginners make with RV batteries include overcharging, undercharging, not properly maintaining the batteries, using the wrong type of battery, and not understanding the electrical system of the RV.
How can overcharging affect RV batteries?
Overcharging can lead to excessive heat and can cause the electrolyte in the battery to evaporate, leading to decreased battery life and performance. It can also cause the battery to become damaged and potentially dangerous.
What are the consequences of undercharging RV batteries?
Undercharging can lead to sulfation, which is the formation of lead sulfate crystals on the battery plates. This can reduce the battery’s capacity and lifespan, and ultimately lead to the battery failing to hold a charge.
Why is it important to properly maintain RV batteries?
Proper maintenance, such as regularly checking the water levels, cleaning the terminals, and ensuring proper ventilation, is important to ensure the longevity and performance of RV batteries. Neglecting maintenance can lead to premature battery failure.
How can beginners ensure they are using the correct type of battery for their RV?
Beginners should consult their RV owner’s manual or seek advice from a professional to ensure they are using the correct type of battery for their specific RV model. Using the wrong type of battery can lead to electrical system issues and potential safety hazards.