So, you’re thinking about RV solar power, huh? It’s a pretty common question these days: “How much solar power do I actually need for my RV?” The short answer is: it depends. And not in a frustrating way, but in a “let’s figure out what works for you” kind of way. Getting this right means less generator noise, more freedom to park in quiet spots, and keeping your fridge running chilly. This guide will walk you through the practical steps to figure out your RV solar needs.
Before you even look at panels, you need to know what you’re powering and for how long. This is where most people get a little fuzzy, but it’s honestly the most crucial part of designing your solar system. Think of it like packing for a trip – you wouldn’t just throw stuff in a bag; you’d think about where you’re going and what you’ll be doing.
Table of Contents
How Many Watts Does Each Appliance Use?
Every electronic device in your RV has a power consumption rating, usually measured in watts (W). You’ll find this information on a sticker on the appliance itself, in its user manual, or sometimes even on the manufacturer’s website. Don’t just guess!
- Look for the “watts” label: This is usually straightforward. A small LED light might be 5W, a laptop charger 65W, and a microwave can be upwards of 1000W.
- Don’t forget things you use less often: That fancy coffee maker, the TV, phone chargers – they all add up. Make a list.
How Long Do You Use Each Appliance?
This is the other half of the equation. A high-wattage appliance used for only a few minutes a day might be less impactful than a lower-wattage one you run for hours.
- Be honest with yourself: How many hours a day do you really spend watching TV, using your laptop, or running the water pump?
- Think about peak usage: When do you tend to use the most power? Mornings for coffee and charging devices? Evenings for entertainment?
Calculating Your Daily Watt-Hours
Once you have your appliance list, their wattage, and estimated usage time, you can calculate your total daily energy consumption in watt-hours (Wh).
- Formula: Wattage of appliance × Hours of usage = Watt-hours.
- Example: If your WiFi booster uses 10W and you run it for 12 hours, that’s 10W × 12h = 120Wh for the day.
- Sum it all up: Add up the Wh for every appliance you use daily. This gives you your total daily energy demand.
If you’re looking to enhance your RV experience with sustainable energy solutions, you might find our comprehensive guide on RV Solar Power Systems particularly useful. To further explore related topics, check out our article on Rv solar setup for Boondocking, which provides insights into how we recommend products and services that can help you maximize your RV adventures while being mindful of your budget.
Sizing Your Solar Array: Converting Sunlight to Stored Power
Now that you know how much power you use, you can start figuring out how much power you need to generate. This involves understanding the relationship between your solar panels, the sun, and your batteries.
How Many Watts of Solar Panels Do I Need to Generate That Power?
This is where oversizing a bit can be your friend. You’re not just trying to match your daily usage; you’re trying to account for cloudy days, less-than-ideal panel angles, and system inefficiencies.
- The “rule of thumb” isn’t always enough: While you might hear people say “100W per person,” that’s a very general guideline. Your actual needs could be higher or lower.
- Consider your location and season: You get more direct sunlight in the desert Southwest in summer than you do in Seattle in November. Your system needs to perform when you’re actually using it.
- Factor in system losses: Panels aren’t 100% efficient, and neither are charge controllers or wiring. Aim to generate about 20-30% more power than you think you’ll need. This provides a buffer.
What Are “Peak Sun Hours”?
This is a critical concept for solar. Peak sun hours aren’t just the number of daylight hours; they represent the equivalent number of hours per day when solar irradiance averages 1,000 watts per square meter.
- It varies geographically: A location might have 6 hours of daylight but only 4.5 peak sun hours due to atmospheric conditions or obstructions.
- Resources for finding peak sun hours: Online solar calculators and resources like the National Renewable Energy Laboratory (NREL) can provide data specific to your region.
- Use conservative estimates: It’s better to slightly overestimate your peak sun hours than underestimate them.
Calculating Your Required Solar Wattage
With your daily watt-hour consumption and peak sun hours in mind, you can start estimating your solar array size.
- Formula: (Total Daily Watt-hours) / (Peak Sun Hours) × 1.25 (for system losses) = Required Solar Wattage.
- Example: If your RV uses 1500Wh per day and you have 4.5 peak sun hours, then (1500Wh / 4.5h) × 1.25 = approximately 417W. This means you’d want a solar array that can produce at least 417 watts.
Battery Bank Sizing: Storing the Sun’s Bounty
Your solar panels generate power, but your batteries store it for when the sun isn’t shining. This is another area where getting the size right is crucial for avoiding frustration.
How Much Battery Capacity Do I Need?
This is directly linked to your daily energy consumption and how many days you want to go without significant solar recharging.
- Deep Cycle Batteries are Key: You’ll be using deep cycle batteries (like lead-acid, AGM, or lithium) which are designed for repeated deep discharges.
- Don’t Drain Them Fully: For lead-acid and AGM batteries, it’s generally recommended not to discharge them below 50% to prolong their life. Lithium batteries can handle deeper discharges (80-90% is often fine), meaning you need less usable capacity.
- Understanding Usable Capacity: If you have 200Ah of lead-acid batteries, you only have about 100Ah of usable capacity at a 50% depth of discharge. If you have 200Ah of lithium, you might have 160-180Ah of usable capacity.
Calculating Your Battery Bank Size
Your battery bank needs to be large enough to cover your power needs during periods without sun, usually overnight and potentially on cloudy days.
- Formula (for 50% Depth of Discharge – Lead Acid/AGM): (Total Daily Watt-hours) / 0.5 (for 50% discharge) = Required Amp-hours (Ah) at the battery’s nominal voltage (usually 12V).
- Formula (for 80% Depth of Discharge – Lithium): (Total Daily Watt-hours) / 0.8 (for 80% discharge) = Required Amp-hours (Ah) at the battery’s nominal voltage.
- Convert to Watt-hours: To compare to your daily usage directly, you can also think in watt-hours. If your daily usage is 1500Wh and you want 2 days of buffer at 50% discharge from lead-acid batteries: (1500Wh/day × 2 days) / 0.5 = 6000Wh of total battery capacity. For a 12V system, this is 6000Wh / 12V = 500Ah.
The Benefit of Lithium Batteries
While more expensive upfront, lithium batteries offer significant advantages for RVers, making them a worthwhile consideration.
- Lighter weight: This is a big deal in RVs.
- Longer lifespan: They can often last much longer than lead-acid counterparts.
- Faster charging: They accept charge much more quickly from solar and shore power.
- Deeper discharge: This means you need a smaller lithium bank for the same usable capacity compared to lead-acid.
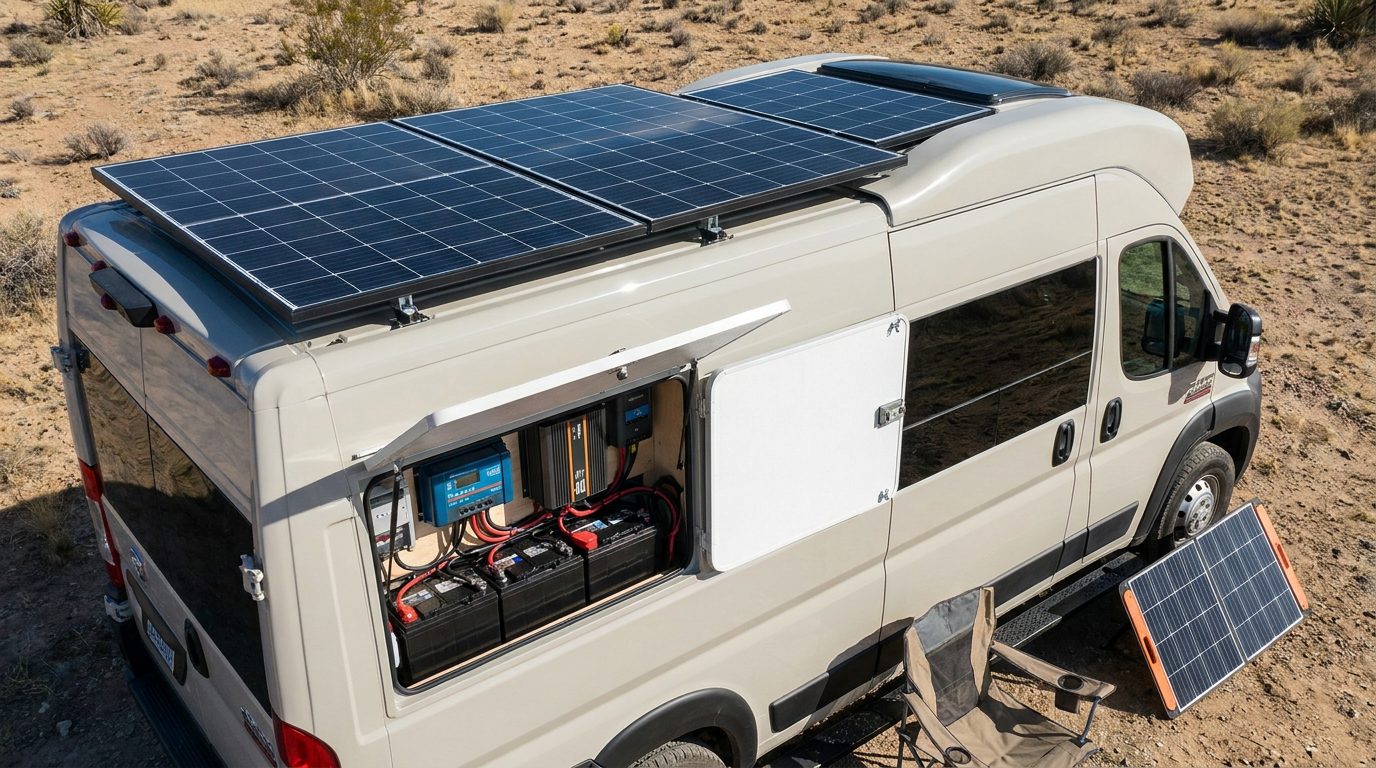
Managing Power Flow: Charge Controllers and Inverters
The best solar panels and batteries are only as good as the components that manage their power. These are the unsung heroes of your system.
The Role of the Charge Controller
This is the brain of your power system, regulating the flow of electricity from your solar panels to your batteries. It prevents overcharging and ensures your batteries are charged efficiently.
- MPPT vs. PWM: You’ll typically see two types: Maximum Power Point Tracking (MPPT) and Pulse Width Modulation (PWM). MPPT controllers are more efficient and can harvest more power, especially in varying light conditions, making them ideal for most RV setups.
- Sizing is Important: Your charge controller needs to be rated for the amperage and voltage coming from your solar array. A common mistake is getting a controller that’s too small, limiting your panels’ output.
The Necessity of an Inverter
If you have appliances that run on AC power (like standard wall outlets), you’ll need an inverter. It converts the DC power stored in your batteries into AC power.
Continuous vs. Surge Wattage: Inverters have a continuous wattage rating (what they can supply steadily) and a surge rating (what they can handle for a short burst, usually for starting motors in appliances like refrigerators or microwaves).
- Continuous vs. Surge Wattage: Inverters have a continuous wattage rating (what they can supply steadily) and a surge rating (what they can handle for a short burst, usually for starting motors in appliances like refrigerators or microwaves).
- Sizing Your Inverter: You need an inverter that can handle the combined wattage of all the AC appliances you might run simultaneously. It’s often wise to have some headroom.
- Pure Sine Wave vs. Modified Sine Wave: Pure sine wave inverters are more expensive but provide cleaner power, which is essential for sensitive electronics like laptops, TVs, and medical equipment. Modified sine wave inverters are cheaper but can cause issues with some devices.
If you’re considering enhancing your RV’s energy efficiency, exploring solar power systems can be a great step forward. For those who also want to ensure their RV’s air conditioning is in top shape, you might find it helpful to check out an article on RV AC repair, which provides easy DIY maintenance steps that can complement your solar setup. By combining these two aspects, you can enjoy a more comfortable and sustainable RV experience.
Putting It All Together: Planning, Installation, and Maintenance
| Component | Description |
|---|---|
| Solar Panels | Photovoltaic panels that convert sunlight into electricity |
| Battery Bank | Stores the electricity generated by the solar panels |
| Charge Controller | Regulates the flow of electricity from the solar panels to the battery bank |
| Inverter | Converts the DC electricity from the battery bank into AC electricity for use in the RV |
| Wiring and Mounting Hardware | Connects the components and secures the solar panels to the RV roof |
Once you’ve done the calculations, it’s time to think about the practicalities.
DIY vs. Professional Installation
This is a big decision, and it depends on your comfort level with electrical work and your available time.
- DIY Pros: Can save money, you learn a lot about your system.
- DIY Cons: Requires careful research, understanding of electrical safety, and the right tools. Mistakes can be costly or dangerous.
- Professional Pros: Peace of mind, ensures the system is properly installed and safe, can offer warranty on workmanship.
- Professional Cons: More expensive.
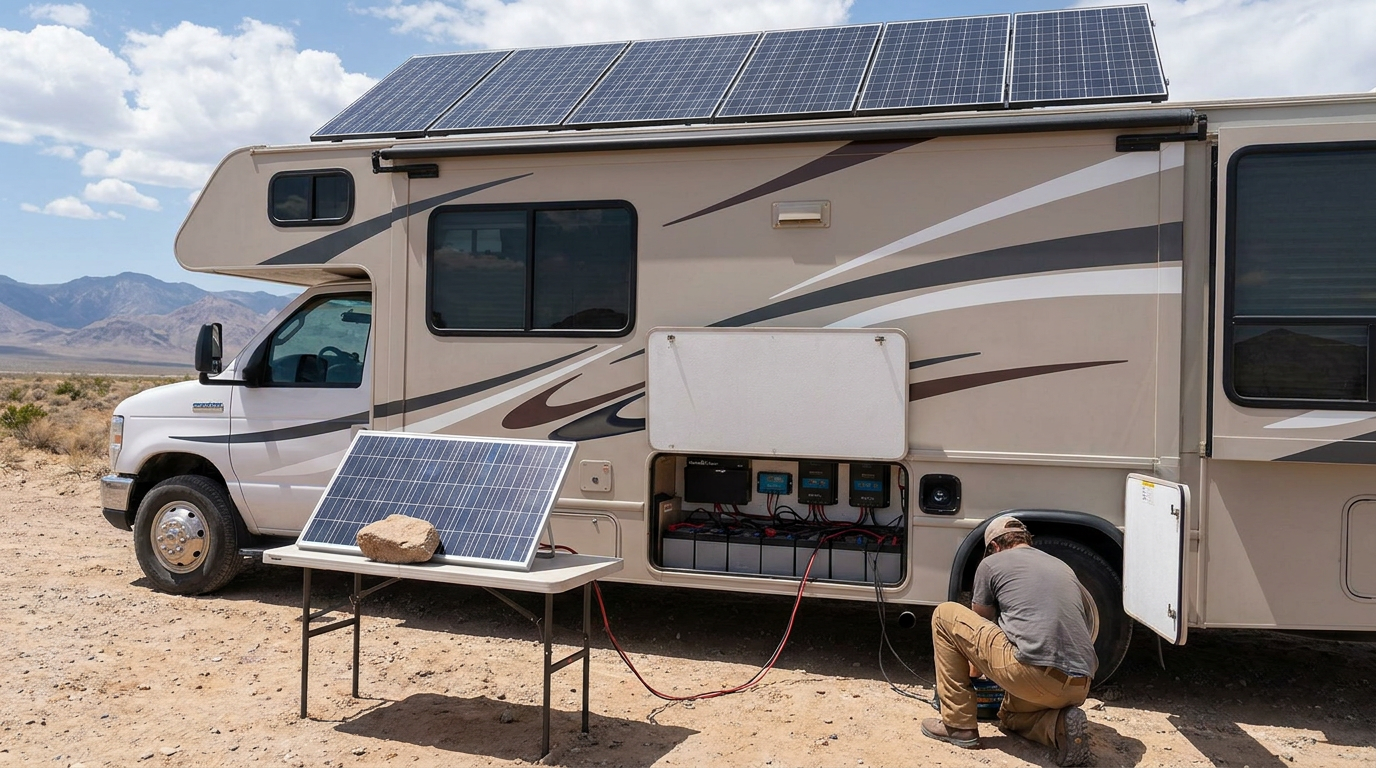
What to Consider During Installation
Regardless of who installs it, certain things are crucial for a well-functioning and safe system.
- Panel Placement: Maximize sun exposure – avoid shade from trees, antennas, or roof AC units. Consider tilt mounts for even better efficiency if you’re stationary for longer periods.
- Wiring: Use appropriate gauge wire to minimize voltage drop. Secure all connections properly.
- Ventilation: Ensure batteries and charge controllers have adequate ventilation, especially in enclosed spaces.
- Fusing and Breakers: Proper fusing and circuit breakers are vital for protecting your equipment and preventing fires.
Ongoing Maintenance for a Healthy System
Your solar system isn’t a “set it and forget it” deal, but maintenance is usually straightforward.
- Clean Your Panels: Dust, dirt, and bird droppings can significantly reduce their output. A simple wash with water and a soft brush usually does the trick.
- Check Connections: Periodically inspect all wiring connections for signs of corrosion or looseness.
- Monitor Battery Health: If you have lead-acid batteries, check water levels regularly. For any battery type, monitor voltage and performance to catch issues early.
- System Monitoring: Many modern charge controllers and inverters have apps or displays that allow you to monitor your system’s performance, which can alert you to problems.
By breaking down your power needs, sizing your components realistically, and paying attention to the installation and maintenance, you can build an RV solar power system that truly enhances your nomadic lifestyle. It takes a bit of research and planning upfront, but the payoff in freedom and self-sufficiency is absolutely worth it.
FAQs
What is an RV solar power system?
An RV solar power system is a setup that uses solar panels to convert sunlight into electricity, which can then be used to power appliances and devices in a recreational vehicle (RV).
How does an RV solar power system work?
RV solar power systems work by capturing sunlight with solar panels, which then convert the sunlight into direct current (DC) electricity. This electricity is then sent to a charge controller, which regulates the flow of electricity to the RV’s batteries. The batteries store the electricity for later use, and an inverter can be used to convert the stored DC electricity into alternating current (AC) electricity for powering appliances and devices in the RV.
What are the benefits of using an RV solar power system?
Some benefits of using an RV solar power system include the ability to generate electricity without relying on shore power or a generator, reduced fuel consumption and emissions, quieter operation, and the potential for cost savings over time.
What components are needed for an RV solar power system?
Key components of an RV solar power system include solar panels, a charge controller, batteries, an inverter, wiring, and mounting hardware. Additional components such as a battery monitor, solar panel tilt mounts, and a generator or shore power connection may also be used depending on the specific setup and needs of the RV owner.
How do I choose the right RV solar power system for my needs?
When choosing an RV solar power system, factors to consider include the amount of electricity needed, available space for solar panels, budget, and desired features such as remote monitoring capabilities. It’s important to carefully assess power requirements and consider consulting with a professional to ensure the chosen system meets the specific needs of the RV.