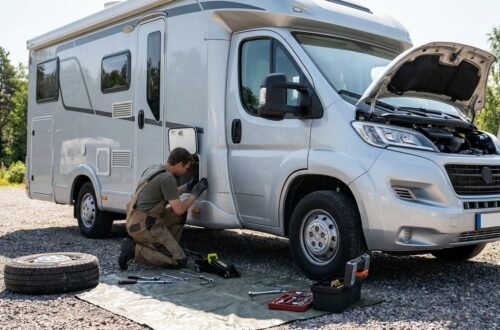

Let’s talk RV roofs. Keeping your RV roof maintenance current is honestly one of the most important things you can do for your rig. A happy roof means no leaks, and no leaks mean a much happier and less expensive RVing experience. The main takeaway here is this: regular inspection and timely sealing are absolutely critical for preventing costly water damage to your RV’s interior. Seriously, a small crack can lead to a big headache, so let’s get into the nitty-gritty of keeping that roof solid.
Think of your RV roof as its first line of defense. It’s constantly exposed to the elements – sun, rain, snow, hail, tree branches, bird droppings, you name it. All this exposure takes a toll, and over time, materials degrade, seals crack, and wear and tear takes over. Ignoring these issues is like inviting water damage in with open arms, and trust me, you don’t want that.
Table of Contents
The Cost of Neglect
Water damage is insidious. It starts small, often unnoticed, and then spreads, rotting wood, fueling mold growth, and destroying interior components. Repairing extensive water damage can easily run into thousands of dollars, often far exceeding the value of the RV itself. Regular maintenance, on the other hand, is a relatively low-cost and preventative measure that can save you a fortune.
Protecting Your Investment
Your RV is a significant investment, whether it’s a small pop-up or a luxurious motorhome. Proper roof maintenance helps preserve its structural integrity, extends its lifespan, and maintains its resale value. Nobody wants to buy an RV with a leaky past.
For those looking to enhance their understanding of RV roof maintenance and sealing, a comprehensive resource can be found in the related article on RV care and upkeep. This guide not only covers essential tips for maintaining your RV roof but also delves into the importance of regular inspections and proper sealing techniques. To explore more about RV maintenance, you can visit the article at 6 things you should do to your rv every year
Understanding Your RV Roof Type
Before you grab any old sealant, it’s crucial to know what kind of roof your RV has. Different roof materials require different cleaning products and sealants. Using the wrong product can actually damage your roof further.
EPDM Rubber Roofs
EPDM (Ethylene Propylene Diene Monomer) roofs are very common. They look somewhat like a continuous sheet of black or white rubber. They’re durable but can chalk over time, leaving white streaks down the sides of your RV.
TPO Rubber Roofs
TPO (Thermoplastic Polyolefin) roofs are also very popular. They are generally smoother to the touch than EPDM and might have a slightly textured feel. TPO is known for its UV resistance and doesn’t typically “chalk” like EPDM.
PVC Roofs
Less common but still out there, PVC (Polyvinyl Chloride) roofs are known for being very puncture-resistant and tend to be quite smooth.
Fiberglass Roofs
Fiberglass roofs are usually found on higher-end motorhomes. They are rigid and often look like a continuation of the RV’s body. They are very durable but can still develop cracks, especially around seams and penetrations.
Aluminum Roofs
Older RVs or some specialty trailers might have aluminum roofs. These are very durable but prone to dents and can suffer from seam separation over time.
Your Essential Roof Inspection Checklist
Alright, let’s get practical. Regular inspections are your secret weapon. Aim for at least twice a year – once before your main travel season and once after – or more frequently if you travel often or park under trees.
What to Look For: General Wear and Tear
Start with a general visual sweep. Get up on the roof (safely!) and just take it all in.
- Cracks and Gaps: This is top priority. Look closely at all seams, around vents, skylights, air conditioners, antenna mounts – anything that penetrates the roof material. Any crack, even a tiny one, is a potential leak point.
- Peeling Sealant: Is the existing sealant lifting, cracking, or crumbling? This is a definite red flag.
- Discoloration: Dark spots, mold, or mildew can indicate water pooling or trapped moisture.
- Punctures and Tears: Look for any damage from tree branches, debris, or even hail.
- Pooling Water: After a rain, check if water sits in any specific areas. While some minor pooling is normal on flexible roofs, large persistent puddles can indicate structural issues or sagging.
- Bubbling or Delamination: If your rubber roof looks like it’s starting to lift or bubble, that’s a sign the adhesive underneath is failing.
- Damaged Vents and Skylights: Check the plastic itself for cracks, and ensure the sealing around their bases is intact.
- Corrosion: On metal components like AC units or antenna bases, check for rust or corrosion, which can compromise seals.
- Overhanging Branches: While you’re up there, trim back any branches that could rub against or fall on your roof.
Don’t Forget the Edges
Pay special attention to where the roof material meets the side walls. These edge seals are prime leak locations. Look for separation, cracking, or any signs of sealant failure.
Interior Clues
Sometimes, the first sign of a roof leak isn’t on the roof itself, but inside the RV.
- Water Stains: Look for discoloration on the ceiling, walls, or inside cabinets, especially around vents, windows, and along the full perimeter of the roof.
- Musty Odors: A persistent musty smell, without an obvious source, can be a sign of hidden mold and moisture.
- Soft Spots: Gently press on various areas of your ceiling. If you find any soft spots or areas that feel spongy, that’s a serious indicator of water damage and wood rot.
Cleaning Your RV Roof: A Crucial First Step
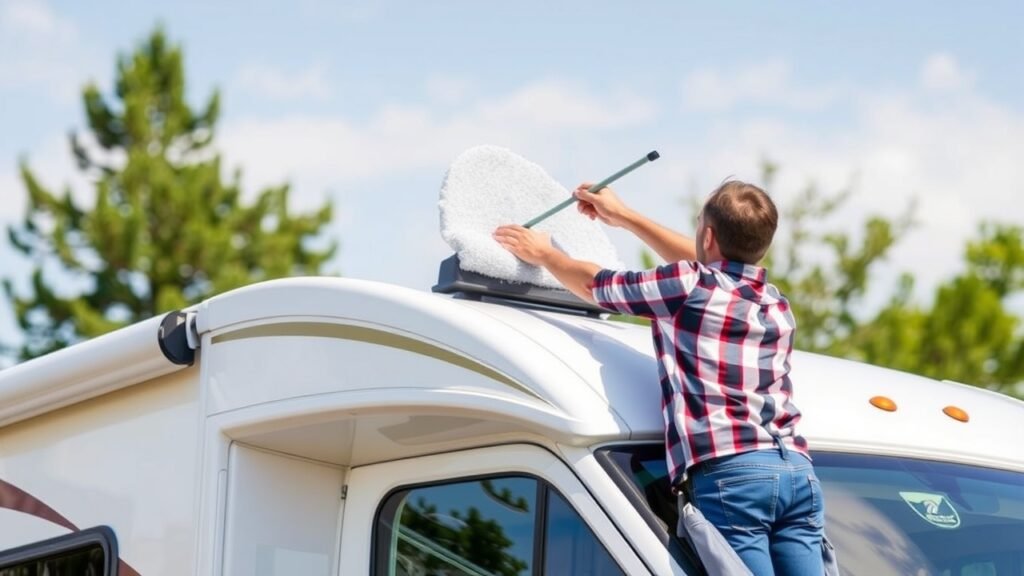
You can’t effectively inspect or seal a dirty roof. Cleaning isn’t just about aesthetics; it removes contaminants that can degrade your roof material and prevents new sealants from properly adhering.
Gather Your Tools
- Soft-bristle brush: Avoid anything too harsh that could scratch or damage the roof.
- RV-specific roof cleaner: Do NOT use harsh household cleaners, citrus-based cleaners, or petroleum-distillate products. These can damage rubber roofs. Read the label to ensure it’s compatible with your roof type.
- Bucket(s): One for soapy water, one for rinse water.
- Hose with good water pressure: No pressure washer unless you know what you’re doing and only use the lowest setting from a safe distance. High pressure can force water under seals or damage the roof.
- Gloves and eye protection: Safety first!
- Ladder: A sturdy one, or use a safety rope if you’re uncomfortable on the roof.
The Cleaning Process
- Remove Loose Debris: Start by sweeping off leaves, twigs, and any other loose debris.
- Rinse Thoroughly: Wet the entire roof with your hose to loosen grime.
- Apply Cleaner: Following the product instructions, apply your RV roof cleaner. You might need to dilute it. Work in sections on larger roofs.
- Scrub Gently: Using your soft-bristle brush, gently scrub the entire surface. Pay extra attention to any stubborn spots, mold, or mildew.
- Rinse Completely: This is important. Rinse off all the cleaner and dirty water thoroughly. Make sure no cleaner residue is left behind, as it can be detrimental to the roof or sealant. Rinse the sides of your RV as well, to prevent streaks from the dirty runoff.
- Insist on Cleanliness: Allow the roof to dry completely before proceeding with any inspection or sealing. This can take several hours, especially on a humid day.
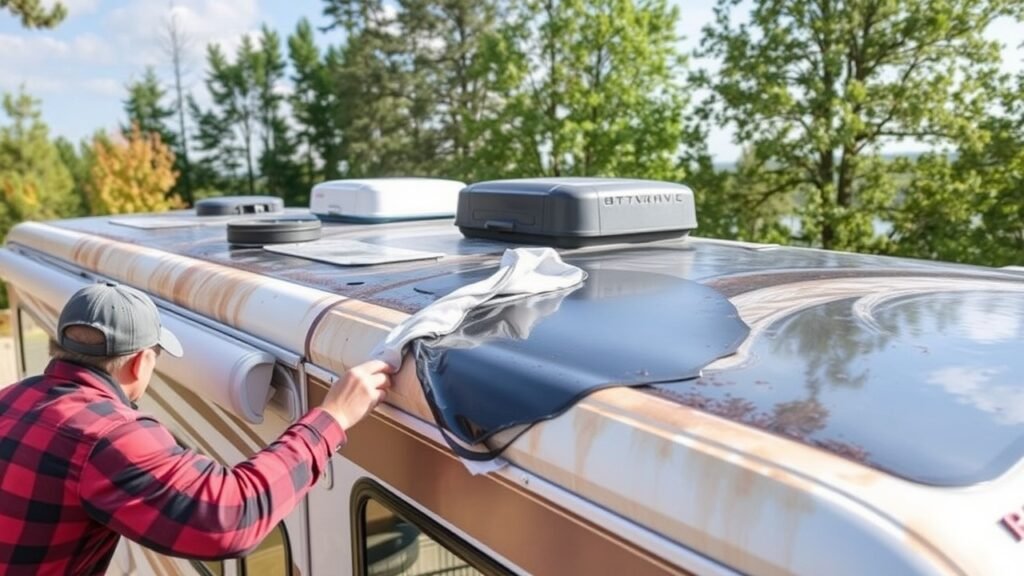
Sealing and Repairing Your RV Roof: The Nitty-Gritty
| Roof Maintenance Task | Frequency | Recommended Product |
|---|---|---|
| Inspect roof for damage | Every 3 months | Roof sealant |
| Clean roof surface | Twice a year | Mild detergent and water |
| Check and reseal seams and edges | Annually | RV roof sealant |
| Inspect and clean roof vents | Every 6 months | RV roof vent covers |
Once your roof is sparkling clean and bone-dry, it’s time to tackle any issues you found during your inspection. This is where you prevent those leaks!
Choosing the Right Sealant
This is critical. As mentioned earlier, different roof types need different sealants.
- Self-Leveling Sealant (Lap Sealant) This is ideal for horizontal surfaces where gravity helps it spread and fill gaps. Brands like Dicor Self-Leveling Lap Sealant are popular for EPDM, TPO, and fiberglass roofs. Make sure you get the right formulation for your roof material (e.g., Dicor EPDM or Dicor TPO specific).
- Non-Sag/Non-Leveling Sealant: For vertical seams or areas where you don’t want the sealant to run (e.g., the edge where the roof meets the sidewall), you’ll need a non-sagging sealant. Again, choose one compatible with your roof type.
- Butyl Tape: This sticky, pliable tape is excellent for setting new vents, skylights, or other fixtures. It creates a waterproof gasket underneath the fixture, which is then often topped with lap sealant.
- Roof Coatings: For an entire roof, especially an older one that’s still structurally sound but showing widespread wear, a liquid roof coating can provide a new protective layer. These are specific to roof types (EPDM, TPO, fiberglass) and offer excellent UV protection.
Prioritizing Repairs
Start with the most obvious and critical issues first.
- Small Cracks and Pinholes:
- Preparation: Clean the area very thoroughly with mineral spirits or denatured alcohol after the initial wash. This removes any residue that could prevent adhesion. Allow it to fully evaporate.
- Application: Apply a bead of self-leveling lap sealant directly over the crack or pinhole. Make sure it slightly overlaps the healthy roof material on either side. Don’t go overboard; a smooth, consistent bead is what you’re aiming for.
- Peeling or Cracking Existing Sealant:
- Removal (Partial): Carefully scrape away any loose, dry, or crumbling sealant using a plastic putty knife. Be gentle! You don’t want to dig into the roof membrane itself.
- Cleaning: Again, clean the area meticulously with mineral spirits or denatured alcohol.
- Application: Apply a fresh bead of self-leveling lap sealant over the remaining old, well-adhered sealant and the newly exposed roof material. The goal is to encapsulate and seal any gaps.
- Replacing a Vent or Skylight (More Involved):
- Removal: Carefully remove the old vent/skylight. This usually involves removing screws, then carefully cutting through the old sealant with a utility knife or putty blade. Be very gentle when separating it from the roof membrane.
- Clean-Up: Scrape away all old sealant and butyl tape from the roof surface around the opening. Clean the area with mineral spirits. This step is critical for proper adhesion of new materials.
- Butyl Tape: Apply a continuous bead of new butyl tape around the underside flange of the new vent/skylight. Make sure it’s a generous amount that will create a good seal when compressed.
- Placement: Carefully set the new vent/skylight into the opening, aligning it properly.
- Fasteners: Secure it with new stainless steel screws (if included or recommended by the manufacturer), ensuring they go through the butyl tape. Don’t overtighten, as this can distort the plastic.
- Lap Sealant: Once secured, apply a very generous and continuous bead of self-leveling lap sealant over all the screw heads and the entire flange of the vent/skylight. This creates the final, waterproof barrier.
Applying Roof Coatings
If you’re applying a full roof coating:
- Thorough Cleaning and Repair: Every single leak or damaged area MUST be repaired before applying the coating. This includes patching any holes or tears. The coating is a protective layer, not a structural repair.
- Product Specifics: Follow the coating manufacturer’s instructions exactly. This includes mixing, application temperature, and drying times.
- Application: Typically, you’ll roll on several thin, even coats with a roller, allowing sufficient drying time between each coat. Ensure full coverage, especially around all roof penetrations and edges.
A Note on Safety
Working on an RV roof can be dangerous.
- Sturdy Ladder: Use a ladder that is rated for your weight and is stable.
- Footing: Wear shoes with good grip.
- Balance: Be mindful of your balance, especially when reaching.
- No Rooftop Partying: Don’t work on the roof if it’s wet, windy, or if you’re feeling unwell.
- Buddy System: If possible, have someone nearby in case you need assistance.
Proper RV roof maintenance is crucial for extending the lifespan of your vehicle and preventing costly repairs. Alongside sealing your roof, it’s also important to ensure that your air conditioning system is functioning efficiently. For more insights on maintaining your RV’s AC system, you can check out this informative article on essential RV AC maintenance tips. By combining roof care with regular AC maintenance, you can keep your RV in top shape for all your adventures.
Long-Term Care and Prevention
Maintaining your RV roof isn’t a one-and-done job. It’s an ongoing process that pays dividends in peace of mind and avoided headaches.
Regular Inspection is Key
I can’t stress this enough. Every few months, or before/after major trips, get up there and give it a good look. Early detection is your best friend when it comes to roof issues.
Proper Storage
- Covered (if possible): If you can store your RV under a cover or in an enclosed space, that’s ideal. It protects the roof from harsh UV rays, hail, and falling debris.
- RV Covers: If you use an RV cover, ensure it’s breathable and fits properly. A poorly fitting cover can cause more damage than good by trapping moisture or chafing.
Avoid Harsh Chemicals
As mentioned, cleaning products matter. Always use RV-specific cleaners for your roof type. Avoid anything with petroleum distillates, citrus, or harsh abrasives.
Trim Trees
If you park your RV regularly in a particular spot, keep an eye on nearby trees. Trim back branches that could rub against the roof, drop leaves/sap, or pose a falling hazard.
Address Problems Promptly
Don’t procrastinate! If you spot a small crack, seal it immediately. A few minutes of work now can prevent days (or weeks) of expensive repairs later.
By following these guidelines, you’ll keep your RV’s roof in excellent condition, protect your investment, and ensure many leak-free adventures on the open road. Happy travels!
FAQs
What are the common types of RV roof materials?
The common types of RV roof materials include EPDM rubber, TPO (thermoplastic olefin), fiberglass, and aluminum. Each material has its own maintenance and sealing requirements.
How often should I inspect and maintain my RV roof?
It is recommended to inspect and maintain your RV roof at least twice a year, preferably in the spring and fall. Regular inspections can help identify any potential issues before they become major problems.
What are the steps for maintaining and sealing an RV roof?
The steps for maintaining and sealing an RV roof typically include cleaning the roof surface, inspecting for any damage or cracks, applying a suitable sealant, and ensuring proper ventilation and drainage systems are in place.
What are the signs of a damaged RV roof that needs sealing?
Signs of a damaged RV roof that needs sealing include water leaks inside the RV, visible cracks or tears on the roof surface, mold or mildew growth, and a sagging or soft roof.
What are the benefits of proper RV roof maintenance and sealing?
Proper RV roof maintenance and sealing can extend the lifespan of the roof, prevent water damage and leaks, maintain the structural integrity of the RV, and ultimately save on costly repairs in the long run.