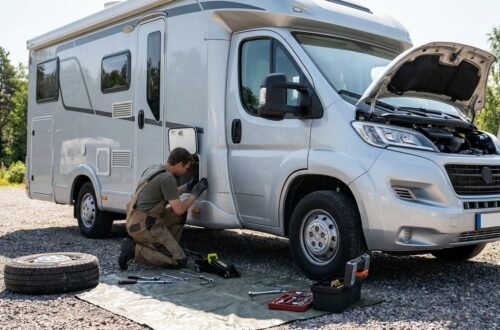
So, you’ve got yourself an RV, and you’re ready to hit the road! One of the less glamorous, but absolutely essential, parts of RV life is dealing with your wastewater tanks. Don’t worry, it’s not as gross or complicated as it might seem. In short, RV dumping tanks for beginners involves connecting a sewer hose from your RV’s black and then gray water tank outlets to a dump station, opening the black tank valve first to flush out solids, closing it, then opening the gray tank valve to rinse the hose and flush out residual waste, and finally, flushing the hose and storing it properly. We’ll walk you through everything you need to know to do it safely and hygienically.
Before you even think about dumping, it’s helpful to understand what you’re dealing with. Your RV typically has two main wastewater tanks, and sometimes a third for freshwater.
Table of Contents
Black Water Tank
This is the one that holds the “nastiest” stuff – everything from your RV toilet. Yep, that means human waste and toilet paper. It’s usually the smaller of the two wastewater tanks, and for good reason. You always want to dump this one first.
Gray Water Tank
The gray water tank collects wastewater from your sinks (kitchen and bathroom) and shower. While it’s not as heavily soiled as black water, it still contains soap residue, food particles, and body oils, so it’s not something you want spilling everywhere. This tank is often larger than the black tank because you tend to use more water for showering and washing dishes.
Freshwater Tank (Not for Dumping)
Just a quick note here – your freshwater tank holds the clean water you’ll be using for drinking, washing, and flushing. It has its own fill point and is not connected to the dumping process of the other two tanks. Don’t confuse it!
Holding Tank Sensors
Most RVs come with sensors that tell you how full your tanks are, usually displayed on a control panel inside your RV. While these are handy, they can sometimes be a bit unreliable, especially for the black tank, as residual waste can stick to them and give you false readings. You’ll learn to develop a feel for when tanks are getting full based on your usage.
If you’re new to RVing and looking to understand the essentials of managing your RV’s black and gray water tanks, it’s important to familiarize yourself with the basics of RV dumping. For a deeper dive into the RV lifestyle, you might find inspiration in our article on the most breathtaking routes to explore in your RV. Check out the scenic drives that can enhance your travel experience by visiting 10 Scenic RV Drives in the USA You Can’t Miss.
When and Where to Dump Your Tanks
Knowing when and where to perform this necessary chore is key to a smooth RV trip.
When to Dump
Ideally, you want to dump your black tank when it’s at least two-thirds full, or even completely full. This is because a fuller tank creates more “liquid slosh,” which helps to carry out all the solid waste. Dumping a nearly empty black tank can leave solids behind, leading to clogs and inaccurate sensor readings. Your gray tank can be dumped when it’s full, or after the black tank to help rinse out your sewer hose.
Where to Dump
You have a few options for where to dump your tanks: here are a couple of apps https://www.rvdumps.com/map-of-rv-dump-stations/
Campground Dump Stations
Most campgrounds, especially those with full hookups, will have a dedicated dump station. These are usually clearly marked and provide a concrete pad with a sewer connection, a non-potable water hose for rinsing (important!), and sometimes a garbage can.
RV Parks with Full Hookups
If you’re staying at an RV park with full hookups, you’ll have a sewer connection right at your campsite. This is the most convenient option, as you can dump whenever necessary without having to move your RV.
Public Rest Stops and Truck Stops
Some rest stops and larger truck stops on major highways offer dump stations for a fee, or sometimes for free. These are great for when you’re on the move and need to empty your tanks between destinations.
RV Dealerships and Service Centers
Occasionally, RV dealerships or service centers will have dump stations available for public use, sometimes for a small fee. It’s always a good idea to call ahead and check.
Essential Equipment for Dumping
Before you start, make sure you have all the necessary gear. Having the right tools makes the process much cleaner and less stressful.
Sewer Hose Kit
This is probably the most crucial piece of equipment. A good sewer hose kit typically includes:
The Hose Itself
Look for a durable, flexible hose that’s at least 15-20 feet long. Some come with two shorter sections that can be connected for extra length, which is handy. Clear elbow fittings are very useful as they allow you to see when the tanks are truly empty and the water is running clear.
Elbow Fitting with Adapter
This attaches to the end of your sewer hose and then twists securely into the dump station’s sewer connection drain. Make sure it’s a tight fit to prevent leaks. Many come with different sized adapters to fit various dump station connections.
Hose Support Kit (Optional but Recommended)
A sewer hose support kit elevates the hose off the ground and creates a continuous downhill slope from your RV to the dump station. This helps ensure proper drainage and prevents sags in the hose where waste can pool.
Disposable Gloves
Absolutely essential! Always wear disposable gloves when handling your sewer hose. This is not a negotiable item. Keep a box handy in your RV.
Non-Potable Water Hose (for Rinsing)
This is a separate hose, DISTINCT from your freshwater drinking hose. It’s used to rinse out your black tank (if your RV has a tank rinse port) and to clean up around the dump station area. Label it clearly, or get one that’s a different color, to avoid any cross-contamination.
Black Tank Flush/Rinse Attachment (Optional)
If your RV doesn’t have a built-in black tank flush system, you can get an attachment that connects to your non-potable water hose and goes down into your toilet to spray water and help clean the tank.
Holding Tank Treatments
These come in liquid or dissolvable packet form and help break down solids and control odors in your black tank. They’re typically added after dumping with a small amount of water.
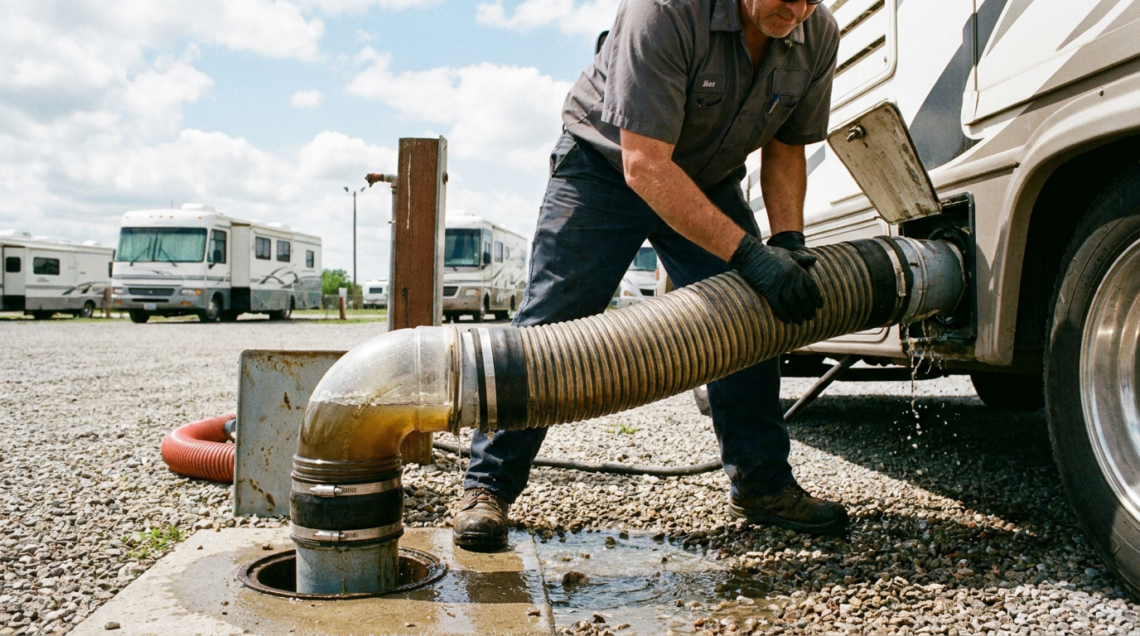
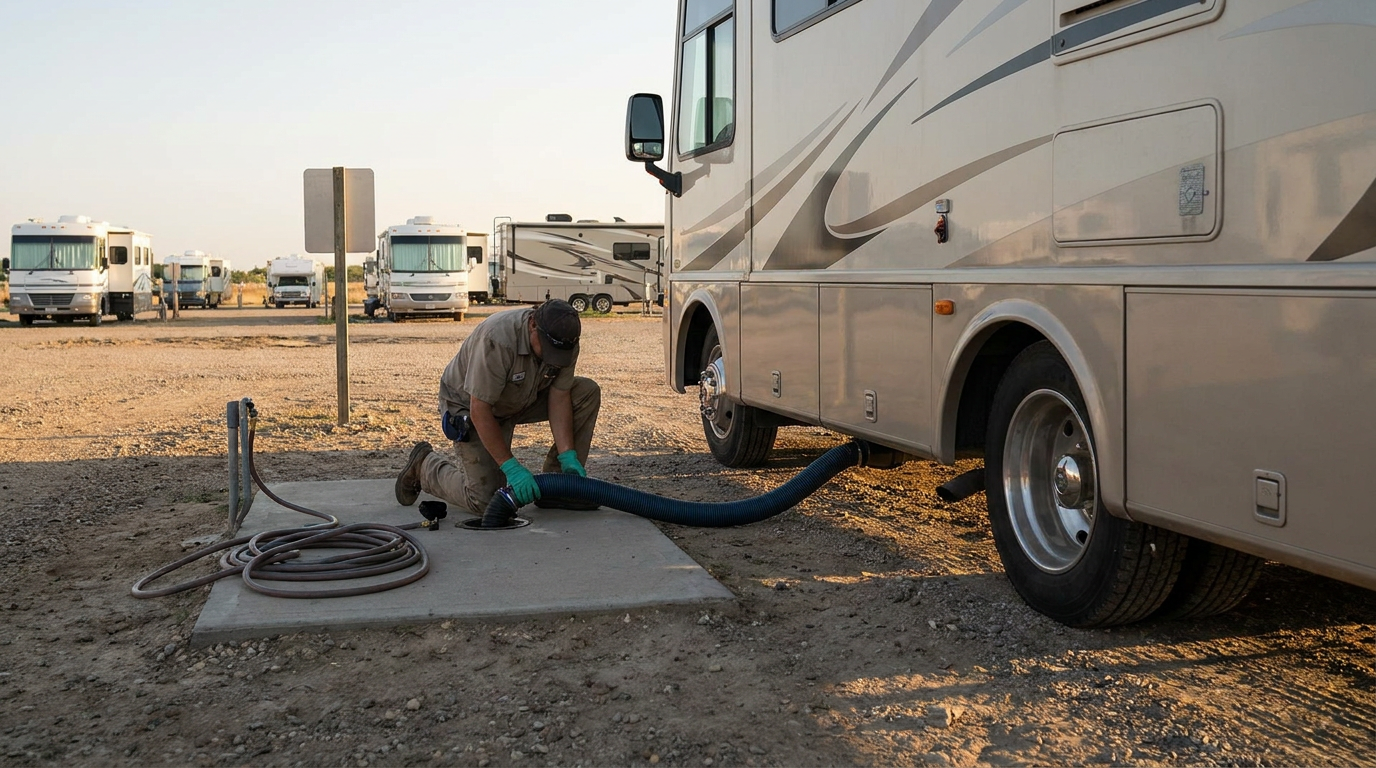
The Step-by-Step Dumping Process
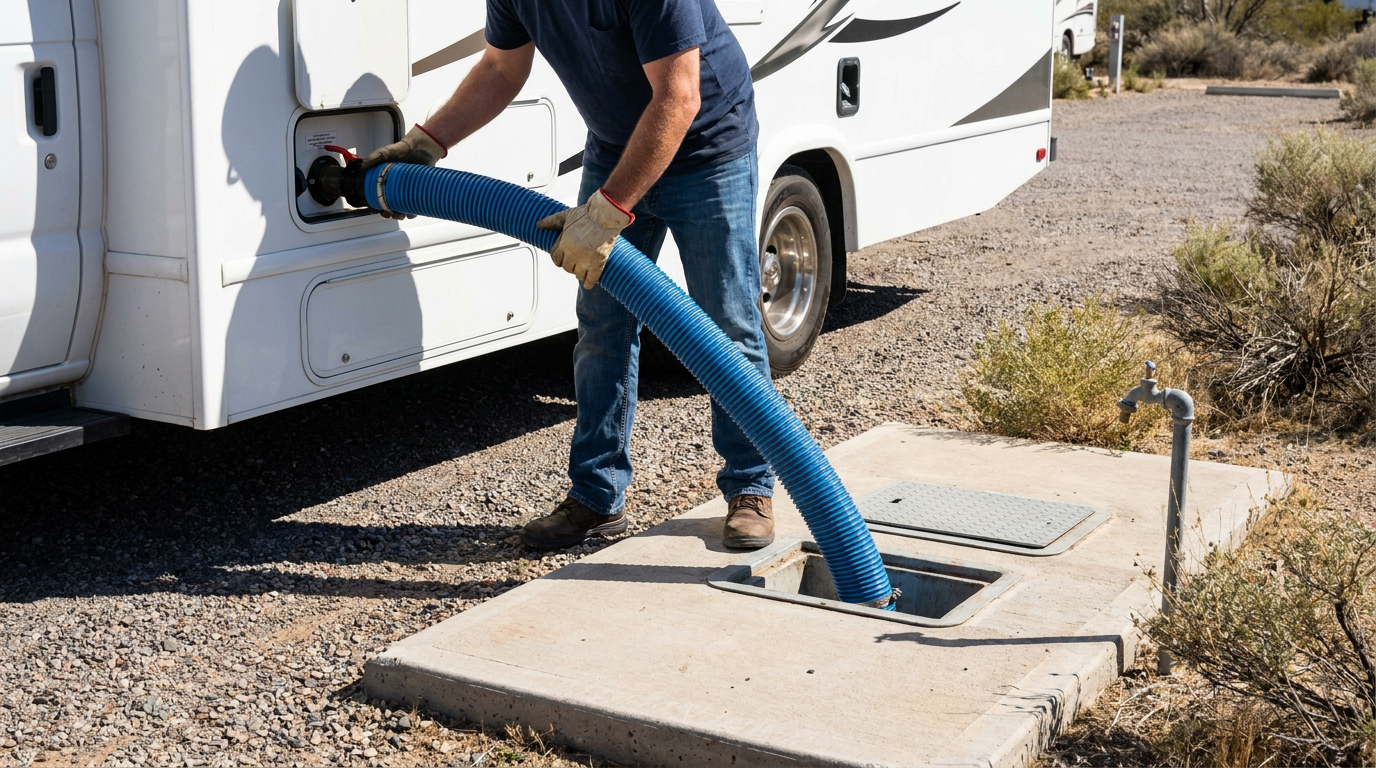
Alright, this is where the rubber meets the road (or rather, the hose meets the dump station). Follow these steps for a clean and efficient dump.
Step 1: Park and Prepare
Positioning the RV
Maneuver your RV so that your sewer outlet is positioned downhill from the dump station connection, if possible, or at least close enough for your sewer hose to reach comfortably without being overly stretched.
Gather Equipment
Lay out your sewer hose, elbow fitting, a pair of gloves, and your non-potable water hose.
Step 2: Connect the Sewer Hose
Wear Your Gloves
Seriously, put them on now.
Connect to RV Outlet
Remove the cap from your RV’s sewer outlet. It usually twists off. Be prepared for a small dribble, even if the valves are closed. Firmly attach one end of your sewer hose to this outlet, twisting it until it’s secure.
Connect to Dump Station
Place the other end of your sewer hose, with the elbow fitting attached, securely into the dump station’s sewer connection. If using a hose support, arrange it now to create that downhill slope.
Step 3: Dump the Black Tank First
Open the Black Tank Valve
Once everything is connected and secure, slowly pull open the valve for your black tank. You’ll hear the waste start to flow. Keep an eye on your clear elbow (if you have one) to see the flow.
Wait for Empty
Allow the black tank to completely drain. You’ll notice the flow slow down and eventually just drips.
Close the Black Tank Valve
Once the black tank is empty, push its valve completely closed.
Step 4: Rinse the Black Tank (Highly Recommended)
Using a Built-in Flush System
If your RV has a black tank flush port, connect your non-potable water hose to it. Turn on the water and allow it to run for several minutes. You’ll see cleaner water coming out of your sewer hose. Continue until the water is mostly clear. This helps clean the sensors and prevents solids from building up.
Using a Wand/Attachment
If you don’t have a built-in flush, you can use a black tank wand that goes down into the toilet with your non-potable hose attached. Just be sure to close the toilet flap first to avoid any splash-back and open the black tank valve again while rinsing.
Re-Dump (If Rinsing)
After rinsing the black tank, open the black tank valve again to let out the rinse water. Close it once it’s empty.
Step 5: Dump the Gray Tank Second
Open the Gray Tank Valve
Now, open the valve for your gray tank. The gray water will flow through your sewer hose, helping to rinse out any remaining black tank residue.
Wait for Empty
Allow the gray tank to completely drain.
Close the Gray Tank Valve
Once the gray tank is empty, push its valve completely closed.
Step 6: Disconnect and Clean Up
Disconnect from Dump Station
Carefully remove the elbow fitting from the dump station connection. Be mindful of any residual drips.
Flush the Hose
Using the non-potable water hose, rinse the inside of your sewer hose thoroughly. You can lift sections of the hose to encourage water flow and ensure all waste is flushed out. Rinse the outside of the hose too, as well as the dump station area if needed.
Disconnect from RV
Remove the sewer hose from your RV’s outlet. Replace the cap on your RV’s sewer outlet.
Rinse Down the Area
Use the non-potable water hose to rinse down any spills or residue around the dump station. Be considerate of the next person.
Step 7: Store Your Equipment
Drain and Store Hose
Coil up your sewer hose, making sure it drains completely. Store it in a dedicated, sealed compartment or a container that’s separate from your freshwater hose and other clean camping gear. Many RVs have a bumper storage tube or a dedicated bay for this.
Store Gloves and Other Items
Dispose of your gloves properly. Store your non-potable water hose and any other dumping equipment.
Add Tank Treatment
Go back into your RV, flush a little water down the toilet (about a gallon), and add your black tank treatment. This will start working to break down waste before your next dump.
For those new to RVing, understanding how to manage your RV’s dumping tanks, specifically black and gray water, is essential for a smooth experience on the road. If you’re looking to enhance your RV knowledge further, you might find it helpful to explore the intricacies of solar systems for RVs, which can significantly improve your off-grid capabilities. Check out this informative article on RV solar systems to learn more about how to power your adventures sustainably while managing your waste effectively.
Troubleshooting and Tips for a Smooth Dump
| Tank Type | Capacity | Dumping Frequency |
|---|---|---|
| Black Water | 20-40 gallons | Every 3-5 days |
| Gray Water | 30-60 gallons | Every 5-7 days |
Even with the best intentions, things can sometimes go awry. Here are some common issues and helpful tips.
Clogged Black Tank
This usually happens when there’s not enough water in the black tank when dumping, or if inappropriate items (like non-RV toilet paper) have been flushed.
How to Deal
If you suspect a clog, try adding a few gallons of water along with a heavy-duty tank treatment designed for clogs and let it sit for a while. Alternatively, you might need a special Roto-Flex type attachment that uses high-pressure water to break up the clog. Prevention is key here: always use plenty of water when flushing and only use RV-safe toilet paper.
Leaks
A leaking connection is no fun.
How to Deal
Double-check that all connections are tight. The rubber gaskets in your hose fittings can wear out, so inspect them regularly and replace them if they’re cracked or deteriorated.
Sensor Malfunctions
Black tank sensors are notorious for giving false readings due to waste sticking to them.
How to Deal
Thoroughly rinsing your black tank after each dump helps. Some people even put ice and a bit of dish soap in the tank and drive around to slosh it around, then dump. There are also specific tank cleaning products that can help loosen debris from the sensors.
Odors
Lingering odors, especially from the black tank, can be unpleasant.
How to Deal
Good ventilation helps, but primarily, consistent use of tank treatments and ensuring your tank is receiving enough water will reduce odors. Also, make sure your roof vents are clear and functioning correctly, as these allow gases to escape. Don’t leave your black tank valve open when hooked up to a sewer at a full-hookup site, as this will prevent solids from liquefying and can lead to a “poop pyramid” and odors from the sewer entering your RV.
Cold Weather Dumping
In freezing temperatures, water can freeze in your tanks and hoses, causing damage.
How to Deal
If dumping in cold weather, try to do it during the warmest part of the day. Have everything ready before you start, and work quickly. You might consider using heated hoses or adding RV antifreeze to your tanks if you’re going to be stationary in freezing conditions for an extended period, but RV antifreeze for drinking water systems isn’t suitable for black/gray tanks unless specifically designed for that purpose as well. Make sure tanks are as empty as possible before potential freezes.
Respecting the Dump Station
Always leave the dump station cleaner than you found it. Wipe down any splashes, hose down the concrete pad, and dispose of trash properly. This ensures a pleasant experience for everyone.
Dumping your RV’s tanks is a fundamental part of responsible RV ownership. With practice, it becomes a quick and routine task. By understanding your system, having the right equipment, and following these steps, you’ll be a pro in no time, ensuring your RV adventures are always clean and worry-free. Happy travels!
FAQs
What are black and gray water tanks in an RV?
Black water tanks hold waste from the toilet, while gray water tanks hold waste from sinks and showers. Both tanks need to be emptied regularly to maintain proper sanitation in the RV.
How often should RV dumping tanks be emptied?
Black water tanks should be emptied every 3-5 days, while gray water tanks can typically go a bit longer, around 5-7 days. However, it’s important to monitor tank levels and empty them before they become too full.
What is the process for emptying RV dumping tanks?
To empty the tanks, first locate the dump station at a campground or RV park. Then, connect the sewer hose to the RV’s waste outlet and the dump station inlet. Open the black water tank valve first, followed by the gray water tank valve to flush out any remaining waste.
Are there any tips for maintaining RV dumping tanks?
Using RV-friendly toilet paper and adding tank treatments can help break down waste and reduce odors. Additionally, regularly flushing the tanks with clean water and avoiding dumping non-biodegradable items can help prevent clogs and odors.
What are the potential risks of improper RV dumping tank maintenance?
Improper maintenance of RV dumping tanks can lead to unpleasant odors, clogs, and even damage to the RV’s plumbing system. It can also pose health risks and harm the environment if waste is not disposed of properly.