

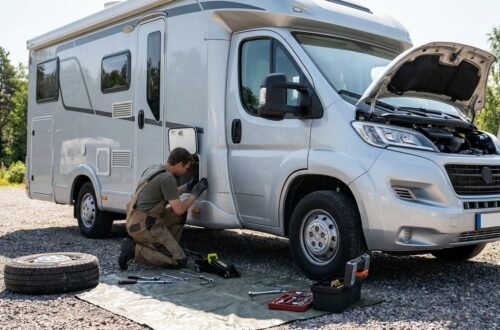
When your RV’s air conditioner decides to take an unscheduled break, it can quickly turn a comfortable trip into a sweat-soaked ordeal. Performing a timely RV AC repair can save your vacation. The good news is that many common AC issues can be addressed with a bit of practical troubleshooting before you need to call in the cavalry. Often, the problem boils down to something as straightforward as a tripped breaker or a dirty coil.
Getting a basic grasp of how your RV’s AC works is the first step towards fixing it. It’s not a mystery box; it’s a system with several key components that need to work in unison. Knowing what these parts are and their general function can help you pinpoint where things went wrong.
The Role of Each Component
Your RV AC unit typically consists of a compressor, condenser coils, evaporator coils, a fan, and various electrical components. The compressor circulates refrigerant, which then cools air as it passes over the evaporator coil. The fan then blows this cooled air into your RV. If any part of this chain isn’t pulling its weight, your AC won’t perform as expected.
Common RV AC Repair Problems and Solutions
From not blowing cold air at all to making strange noises, there’s a range of issues you might encounter. We’ll dive into some of the most frequent culprits and how you can tackle them effectively. Remember, starting with the simplest solutions often saves you time and money.
If you’re looking for more information on RV AC repair, you might find this article helpful: Essential RV AC Maintenance Tips. It provides insights into common issues faced by RV owners and tips on maintaining your air conditioning system to ensure optimal performance during your travels.
Tackling Electrical Issues
Electrical problems are a common reason for AC failure. Fortunately, many of these are relatively easy to diagnose and remedy yourself. It’s imperative to always prioritize safety when dealing with electricity.
The First Check: Breakers and Fuses
If your AC unit won’t even kick on, the first thing to inspect is your circuit breaker. A tripped breaker is a very common cause, especially if you’re hooked up to shore power that might not be as robust as your home’s electrical system. Locate your RV’s electrical panel (often near the main entrance or in a cabinet) and look for any breakers that are in the “off” or middle position. Flip them firmly to the “off” position, then back to “on.”
Shore Power Connection
Beyond the internal breakers, also check the connection at both ends of your RV power cord. A loose connection can cause a power drop. Furthermore, peek into your fuse box. Blown fuses can also cut power to components, and they’re usually easy to spot and replace with a spare of the correct amperage.
Voltage Verification
Your RV’s AC compressor needs a specific amount of voltage to operate correctly. If your AC isn’t blowing cold air, or is making a humming sound but not cooling, low voltage could be the culprit.
Minimum Voltage Requirements
The compressor generally requires at least 110 volts to function properly. If your voltage dips below this threshold, the compressor won’t engage, or it will struggle, potentially leading to damage. You can use a multimeter to test the voltage at an outlet near your AC unit. If the voltage is consistently low, you might be experiencing issues with your shore power supply, or your RV’s electrical system needs attention.
Coil and Fin Maintenance
Dirty coils and bent fins are silent killers of AC efficiency. They might not stop your unit from working entirely, but they will severely impact its cooling performance, making your RV feel warmer than it should be.
Keeping Condenser Coils Clean
The condenser coils, typically located on the outdoor unit, are where heat is expelled from your RV. If these coils are covered in dirt, dust, leaves, or even airborne pollutants, the heat exchange process is significantly hindered.
Regular Cleaning Routine
Aim to clean your condenser coils at least twice a year. You can start by vacuuming them with an attachment that has soft bristles to remove loose debris. For a deeper clean, consider using a specialized AC coil cleaner product. These cleaners often foam up to lift grime and can then be rinsed away carefully with water. Ensure the unit is powered off before you start cleaning.
Straightening Bent Fins
Those delicate metal fins on your condenser and evaporator coils play a crucial role in heat transfer. If they get bent, airflow is restricted, and the AC’s efficiency drops.
Using a Fin Comb
You can purchase a fin comb specifically designed for this task. These inexpensive tools come with various comb sizes to match different fin spacing. Gently work the comb through the bent fins to straighten them. Be patient and apply gentle pressure to avoid causing further damage. This simple step can noticeably improve your AC’s performance.
Preventative Care for Longevity
A little proactive maintenance goes a long way in extending the life of your RV AC unit and preventing unexpected breakdowns. Consider these routine checks as an investment in your comfort.
Lubricating the AC Fan
The fan motor in your AC unit has bearings that require lubrication to operate smoothly. If the fan makes a squealing or grinding noise, it might be a sign that it needs some oil.
Regular Oiling
Consult your RV AC unit’s manual for specific lubrication points and recommended lubricants. Often, a few drops of lightweight motor oil (like 3-in-1 oil) applied to the fan motor’s oil ports can greatly improve its operation and prevent premature wear. Do this preventatively, not just when you hear a problem.
Protecting Your Unit During Storage
When your RV isn’t in use, especially during the off-season, protecting the AC unit from the elements is a smart move.
AC Unit Covers
Investing in a designated RV AC unit cover can shield it from harsh weather, UV rays, dirt, and debris. This simple act can prevent expensive repairs down the line by protecting internal components from corrosion and physical damage. Ensure the cover is breathable to prevent moisture buildup underneath.
Seal and Shroud Inspection
The integrity of the AC unit’s seal to the RV roof is paramount to prevent water leaks inside your rig. Additionally, the exterior shroud protects the internal components from environmental factors.
Checking for Damage and Debris
Regularly inspect the coil seal between the AC unit and your RV roof. Look for cracking, shrinking, or any signs of compromise. Reseal as needed with a compatible sealant. Take off the outer shroud (usually held by screws) and look for physical damage to the coils or wiring, bird or squirrel nests, chewed wires, or any accumulation of debris that could block airflow or pose a fire hazard. Cleaning out any debris under the shroud is essential for optimal performance.
Frequently Asked Questions (FAQ)
How much does RV AC repair cost?
Minor repairs like cleaning or replacing a capacitor typically cost between $150 and $300. However, a full compressor replacement or a new unit can range from $800 to $1,500.
How often should I clean my RV AC filters?
If you use your RV frequently, you should check and clean the filters every two weeks. For occasional use, once a month is usually sufficient to ensure proper airflow.
Can I run my RV AC on a regular household outlet?
Standard household outlets (15-20 amps) may struggle to start an RV AC unit, which often requires 30 amps. Using a “soft start” device can help, but always monitor for overheating wires.
If you’re looking for valuable insights on RV AC repair, you might find this article particularly helpful. It covers essential tips and common issues that RV owners face with their air conditioning systems. For a deeper understanding of maintenance and troubleshooting, check out this informative piece on RV care.
When Professional Help is Necessary
| Service Provider | Location | Cost | Response Time |
|---|---|---|---|
| ABC RV Repair | Phoenix, AZ | 150 | 24 hours |
| RV Masters | Orlando, FL | 200 | Same day |
| Mobile RV Service | San Diego, CA | 175 | 2 days |
While many AC issues can be resolved with DIY troubleshooting, there are times when it’s safer and more effective to call in a professional RV AC technician. Knowing your limits is key to avoiding further damage or injury.
Electrical Work Beyond Your Comfort Zone
If you encounter exposed wires that appear damaged, or if your troubleshooting points to more complex electrical issues, it’s time to step back.
Safety First
Dealing with electrical systems, particularly high voltage, can be dangerous if you’re not trained. Don’t attempt to repair wiring if you’re unsure how to proceed. A qualified technician has the tools, knowledge, and safety protocols to handle these situations effectively. Ignoring complex electrical issues can lead to persistent problems or even fire hazards.
Persistent Problems After Troubleshooting
You’ve checked the breaker, cleaned the coils, straightened the fins, and verified your voltage. Yet, your AC still isn’t performing as it should. This indicates a deeper problem.
The Value of Expertise
An RV AC technician has specialized diagnostic tools and expertise to identify issues like refrigerant leaks, compressor failures, or problems with the control board. These are not typically DIY repairs and require specific equipment and knowledge. Consulting a professional can save you from costly trial-and-error repairs and ensure the job is done correctly the first time. They can also offer insights into optimizing your system for better performance and longevity.

2 Comments on “Expert Tips for RV AC Repair: 7 Easy DIY Maintenance Steps”